Rails - Hello World 2020
We need to get our Rails application server running:
We already have a functional Rails application already. We can see it if we start a web server on our development machine by running the following in the root directory of our rails application (in blog directory):
# cd /var/www/html/blog
# rails server
This will launche WEBrick, a webserver built into Ruby by default. We'll use this any time we want to access our application through a web browser.
=> Booting WEBrick
=> Rails 4.1.1 application starting in development on http://0.0.0.0:3000
=> Run `rails server -h` for more startup options
=> Notice: server is listening on all interfaces (0.0.0.0). Consider using 127.0.0.1 (--binding option)
=> Ctrl-C to shutdown server
[2014-05-13 18:27:25] INFO  WEBrick 1.3.1
[2014-05-13 18:27:25] INFO  ruby 1.9.3 (2013-11-22) [x86_64-linux]
[2014-05-13 18:27:25] INFO  WEBrick::HTTPServer#start: pid=3011 port=3000
We may get "Could not find a JavaScript runtime", then we need to install nodejs. On Ubuntu:
# apt-get install nodejs
To see our application in action, open a browser window and navigate to http://localhost:3000.
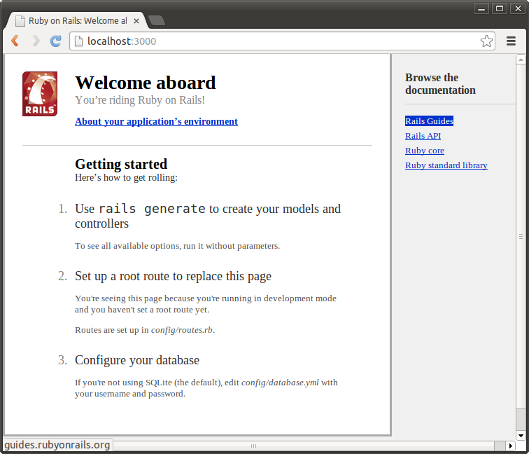
The Welcome Aboard page is the smoke test for a new Rails application: it makes sure that we have your software configured correctly enough to serve a page. We can also click on the "About your application's environment" link to see a summary of our application's environment. It displays the following information:
Ruby version	1.9.3-p484 (x86_64-linux)
RubyGems version	2.2.2
Rack version	1.5
Rails version	4.1.1
JavaScript Runtime	Node.js (V8)
Active Record version	4.1.1
Action Pack version	4.1.1
Action View version	4.1.1
Action Mailer version	4.1.1
Active Support version	4.1.1
Middleware

    Rack::Sendfile
    ActionDispatch::Static
    Rack::Lock
    #
    Rack::Runtime
    Rack::MethodOverride
    ActionDispatch::RequestId
    Rails::Rack::Logger
    ActionDispatch::ShowExceptions
    ActionDispatch::DebugExceptions
    ActionDispatch::RemoteIp
    ActionDispatch::Reloader
    ActionDispatch::Callbacks
    ActiveRecord::Migration::CheckPending
    ActiveRecord::ConnectionAdapters::ConnectionManagement
    ActiveRecord::QueryCache
    ActionDispatch::Cookies
    ActionDispatch::Session::CookieStore
    ActionDispatch::Flash
    ActionDispatch::ParamsParser
    Rack::Head
    Rack::ConditionalGet
    Rack::ETag

Application root	/var/www/html/blog
Environment	development
Database adapter	sqlite3
Database schema version	0
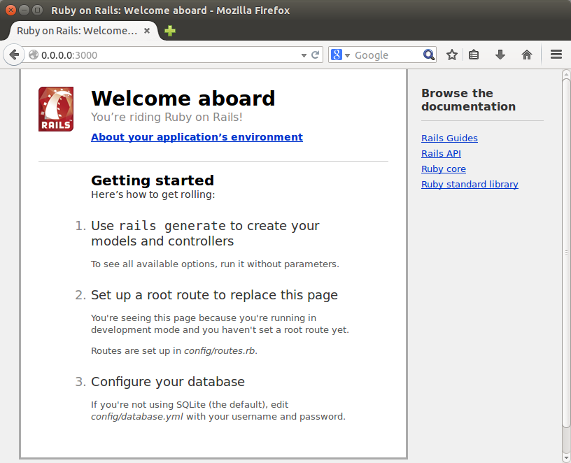
We can use 0.0.0.0 instead of localhost and get the same page:
To get "Hello World" from Rails, we need to create at minimum a controller and a view.
- A controller is needed to receive requests for the application.
- Routing decides which controller receives which requests. Often, there is more than one route to each controller, and different routes can be served by different actions.
- Each action's purpose is to collect information to provide it to a view.
- A view's purpose is to display this information in a readable format.
- An important distinction to make is that it is the controller, not the view, where information is collected. The view should just display that information.
- By default, view templates are written in a language called ERB (Embedded Ruby) which is converted by the request cycle in Rails before being sent to the user.
The rails generate command uses templates to create a whole lot of things. Running rails generate by itself gives a list of available generators:
# rails generate
Usage: rails generate GENERATOR [args] [options]

General options:
  -h, [--help]     # Print generator's options and usage
  -p, [--pretend]  # Run but do not make any changes
  -f, [--force]    # Overwrite files that already exist
  -s, [--skip]     # Skip files that already exist
  -q, [--quiet]    # Suppress status output

Please choose a generator below.

Rails:
  assets
  controller
  generator
  helper
  integration_test
  jbuilder
  mailer
  migration
  model
  resource
  scaffold
  scaffold_controller
  task

Coffee:
  coffee:assets

Jquery:
  jquery:install

Js:
  js:assets

TestUnit:
  test_unit:generator
  test_unit:plugin
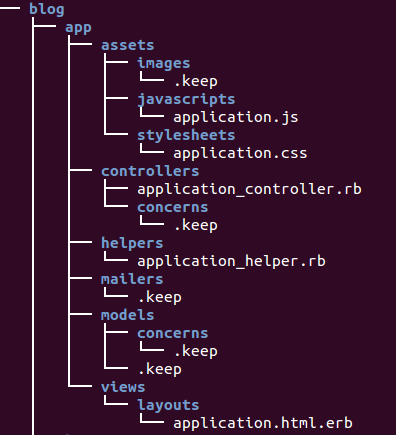
The tree below shows the current file structure for blog/app:
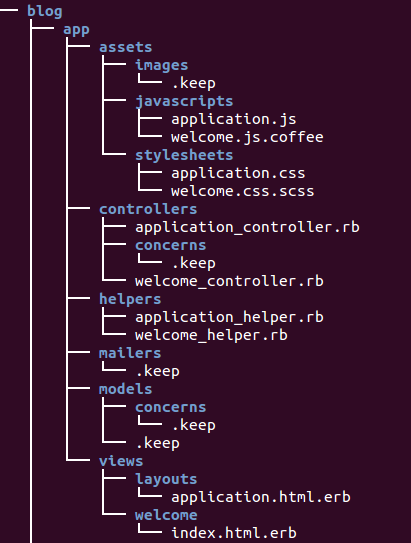
To create a new controller, we need to run the controller generator and tell it we want a controller called welcome with an action called index:
# rails generate controller welcome index
      create  app/controllers/welcome_controller.rb
       route  get 'welcome/index'
      invoke  erb
      create    app/views/welcome
      create    app/views/welcome/index.html.erb
      invoke  test_unit
      create    test/controllers/welcome_controller_test.rb
      invoke  helper
      create    app/helpers/welcome_helper.rb
      invoke    test_unit
      create      test/helpers/welcome_helper_test.rb
      invoke  assets
      invoke    coffee
      create      app/assets/javascripts/welcome.js.coffee
      invoke    scss
      create      app/assets/stylesheets/welcome.css.scss
The controller and the view are the most important of these. The controller is located at app/controllers/welcome_controller.rb and the view is located at app/views/welcome/index.html.erb.
Open the app/views/welcome/index.html.erb file in your text editor. Delete all of the existing code in the file, and replace it with the following single line of code:
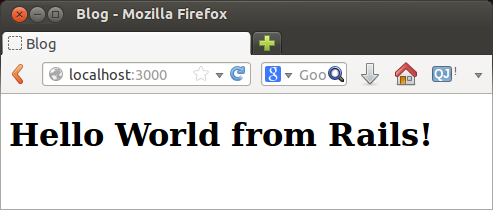
<h1>Hello World from Rails!</h1>
We have made the controller and view.
- We need to tell Rails when we want "Hello World from Rails!" to be displayed. In our case, we want it to show up when we navigate to the root URL of our site, http://localhost:3000. It will replace "Welcome Aboard".
- Next, we have to tell Rails where our actual home page is located.
Open the file config/routes.rb:
Blog::Application.routes.draw do
  get "welcome/index"
  # The priority is based upon order of creation: first created -> highest priority.
  # See how all your routes lay out with "rake routes".

  # You can have the root of your site routed with "root"
  # root 'welcome#index'

  # Example of regular route:
  #   get 'products/:id' => 'catalog#view'
This is our application's routing file which holds entries in a special DSL (domain-specific language) that tells Rails how to connect incoming requests to controllers and actions. This file contains many sample routes on commented lines, and one of them actually shows us how to connect the root of our site to a specific controller and action. Find the line beginning with root and uncomment it. It should look something like the following:
root "welcome#index"
The root "welcome#index" tells Rails to map requests to the root of the application to the welcome controller's index action and get "welcome/index" tells Rails to map requests to http://localhost:3000/welcome/index to the welcome controller's index action. This was created earlier when we ran the controller generator (rails generate controller welcome index).
If you navigate to http://localhost:3000 in our browser, we'll see the "Hello World from Rails!" message we put into app/views/welcome/index.html.erb, indicating that this new route is indeed going to WelcomeController's index action and is rendering the view correctly.
Ph.D. / Golden Gate Ave, San Francisco / Seoul National Univ / Carnegie Mellon / UC Berkeley / DevOps / Deep Learning / Visualization