Qt5 Tutorial Creating QtQuick2 QML Animation B - 2020
This tutorial is a continuation from the previous tutorial Qt Quick2 QML Animation A.
This was where we left in the previous section:
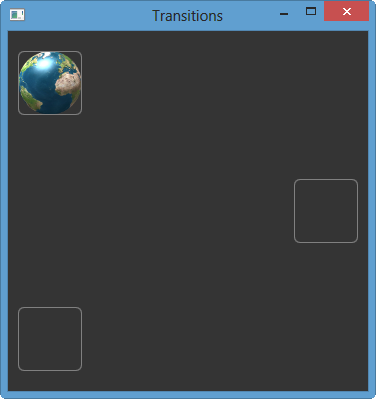
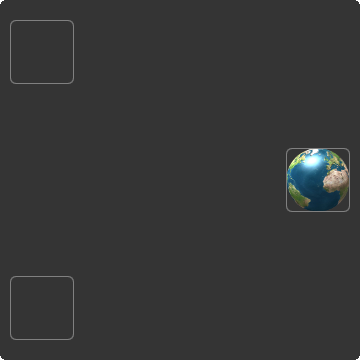
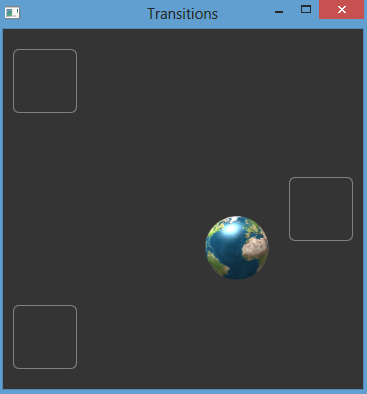
We should see the Earth in the top left rectangle, and two additional rectangles in the center right and bottom left of the screen.
We can now create additional states to add views to the application.
Before we move on, let's familiarized ourselves with the names of the pane:
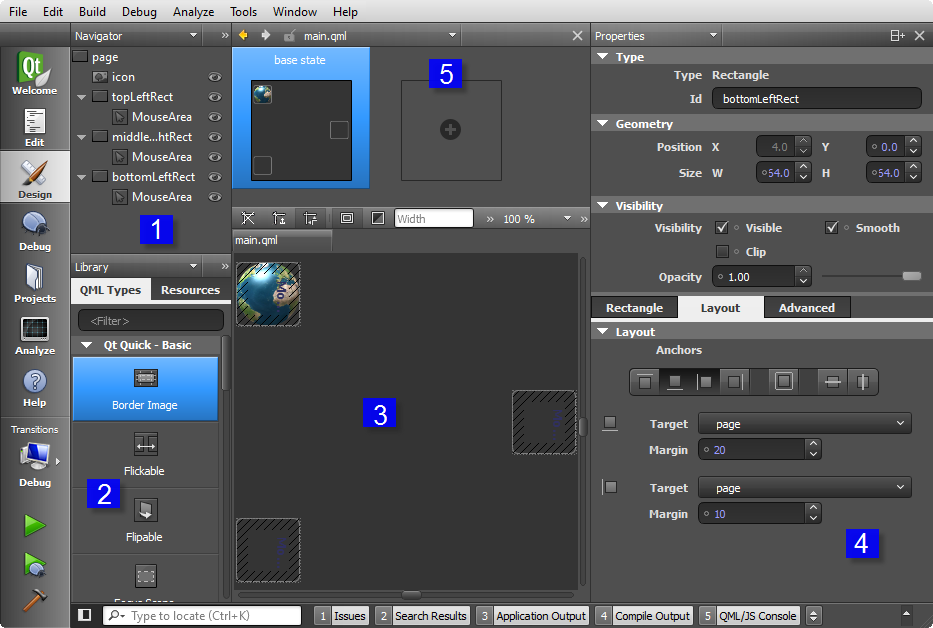
- Navigator pane displays the items in the current QML file as tree structure.
- Library pane displays the building blocks that you can use to design applications: predefined QML types, your own QML components, Qt Quick components or Qt Quick Controls that you import to the project, and other resources.
- Canvas is the working area where you create QML components and design applications.
- Properties pane organizes the properties of the selected item. You can change the properties also in the code editor.
- State pane displays the different states of the item. QML states typically describe user interface configurations, such as the UI controls, their properties and behavior and the available actions. Managing Item Hierarchy.
OK. Let's continue.
In the .qml file, we already created pointers to two additional states: State1 and State2. To create the states:
- Click the empty slot in the States pane to create State1.
- Click the empty slot in the States pane to create State2.
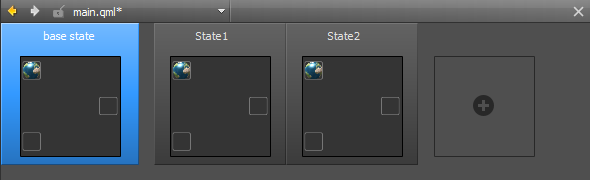
This will create a skeleton of the states in the main.qml:
states: [
    State {
        name: "State1"
    },
    State {
        name: "State2"
    }
]
All we have to do is just to filling it in for the PropertyChanges.
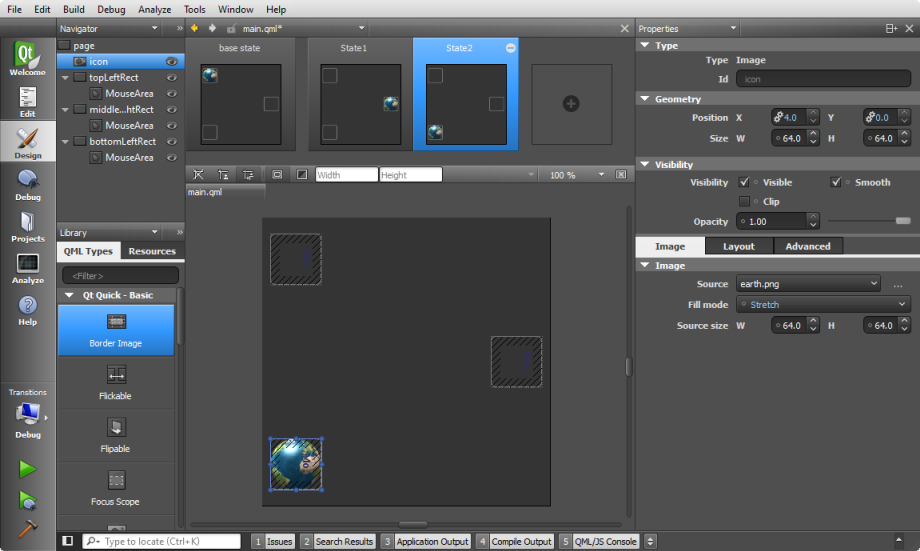
In the code editor, bind the position of the earth icon to the rectangle to make sure that the icon is displayed within the rectangle when the view is scaled on different sizes of screens. Set expressions for the x and y properties, as illustrated by the following code snippet:
 states: [
     State {
         name: "State1"

         PropertyChanges {
             target: icon
             x: middleRightRect.x
             y: middleRightRect.y
         }
     },
     State {
         name: "State2"

         PropertyChanges {
             target: icon
             x: bottomLeftRect.x
             y: bottomLeftRect.y
         }
     }
 ]
Press Ctrl+R to run the application.
Click the rectangles to move the earth icon from one rectangle to another:
- Press the mouse on the destination rectangle:
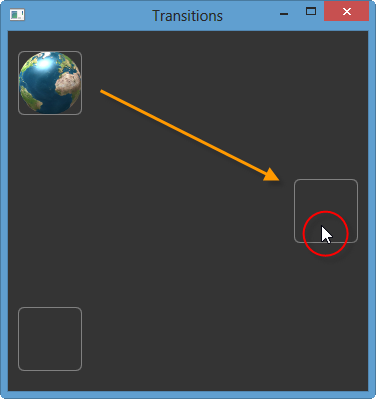
- The earth icon moved from base state to State1:
Add transitions to define how the properties change when the earth icon moves between states. The transitions apply animations to the earth icon. For example, the earth icon bounces back when it moves to the middleRightRect and eases into bottomLeftRect. Add the transitions in the code editor.
In the code editor, add the following highlighted transition code to specify that when moving to State1, the x and y coordinates of the earth icon change linearly over a duration of 1 second:
...
...
states: [
State {
name: "State1"
PropertyChanges {
target: icon
x: middleRightRect.x
y: middleRightRect.y
}
},
State {
name: "State2"
PropertyChanges {
target: icon
x: bottomLeftRect.x
y: bottomLeftRect.y
fillMode: "Stretch"
}
}
]
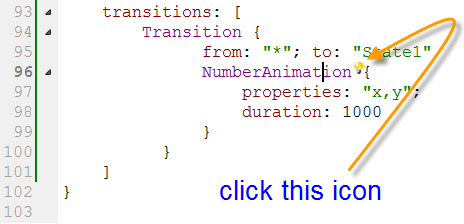
transitions: [
Transition {
from: "*"; to: "State1"
NumberAnimation {
properties: "x,y";
duration: 1000
}
}
]
}
If we run the code now, we can see the earth icon moves in straight line from base state to State1 in one second.
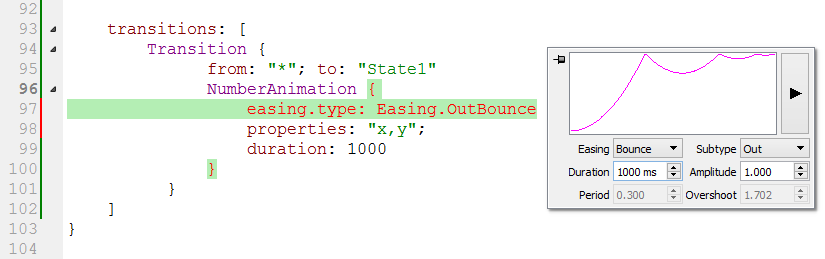
We can use the Qt Quick toolbar for animation to change the easing curve type from linear to OutBounce:
- Click NumberAnimation in the code editor to display the icon, and then click the icon to open the toolbar:
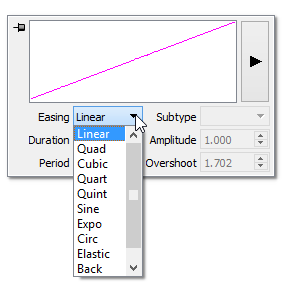
- In the Easing field, select Bounce. Then, nn the Subtype field, select Out.
Add the following code to specify that when moving to State2, the x and y coordinates of the Qt logo change over a duration of 2 seconds, and an InOutQuad easing function is used:
     Transition {
         from: "*"; to: "State2"
         NumberAnimation {
             properties: "x,y";
             easing.type: Easing.InOutQuad;
             duration: 2000
         }
     },
Add the following code to specify that for any other state changes, the x and y coordinates of the Qt logo change linearly over a duration of 200 milliseconds:
     Transition {
         NumberAnimation {
             properties: "x,y";
             duration: 200
         }
     }
Here is the final main.qml:
import QtQuick 2.0

Rectangle {
    id: page
    width: 360
    height: 360
    color: "#343434"

    Image {
        id: icon
        x: 10
        y: 20
        source: "earth.png"
    }

    Rectangle {
        id: topLeftRect
        width: 64
        height: 64
        color: "#00000000"
        radius: 6
        anchors.left: parent.left
        anchors.leftMargin: 10
        anchors.top: parent.top
        anchors.topMargin: 20
        border.color: "#808080"

        MouseArea {
            anchors.fill: parent
            onClicked: page.state = ''
        }
    }

    Rectangle {
        id: middleRightRect
        x: 6
        y: -6
        width: 64
        height: 64
        color: "#00000000"
        radius: 6
        anchors.right: parent.right
        anchors.rightMargin: 10
        anchors.verticalCenter: parent.verticalCenter
        border.color: "#808080"
        MouseArea {
            anchors.fill: parent
            onClicked: page.state = 'State1'
        }
    }

    Rectangle {
        id: bottomLeftRect
        x: 4
        y: 0
        width: 64
        height: 64
        color: "#00000000"
        radius: 6
        anchors.bottom: parent.bottom
        anchors.bottomMargin: 20
        border.color: "#808080"
        anchors.left: parent.left
        anchors.leftMargin: 10
        MouseArea {
            anchors.fill: parent
            onClicked: page.state = 'State2'
        }
    }
    states: [
        State {
            name: "State1"

            PropertyChanges {
                target: icon
                x: middleRightRect.x
                y: middleRightRect.y
            }
        },

        State {
            name: "State2"

            PropertyChanges {
                target: icon
                x: bottomLeftRect.x
                y: bottomLeftRect.y
                fillMode: "Stretch"
            }
        }
    ]

    transitions: [
        Transition {
              from: "*"; to: "State1"
              NumberAnimation {
                  easing.type: Easing.OutBounce
                  properties: "x,y";
                  duration: 1000
              }
        },

        Transition {
               from: "*"; to: "State2"
               NumberAnimation {
                   properties: "x,y";
                   easing.type: Easing.InOutQuad;
                   duration: 2000
               }
        },

        Transition {
            NumberAnimation {
                properties: "x,y";
                duration: 200
            }
        }
    ]
}
Press Ctrl+R to run the application.
Click the destination rectangles to view the animated transitions.
Looks great!
Here is the source code:
Transitions.zip.
Qt 5 Tutorial
- Hello World
- Signals and Slots
- Q_OBJECT Macro
- MainWindow and Action
- MainWindow and ImageViewer using Designer A
- MainWindow and ImageViewer using Designer B
- Layouts
- Layouts without Designer
- Grid Layouts
- Splitter
- QDir
- QFile (Basic)
- Resource Files (.qrc)
- QComboBox
- QListWidget
- QTreeWidget
- QAction and Icon Resources
- QStatusBar
- QMessageBox
- QTimer
- QList
- QListIterator
- QMutableListIterator
- QLinkedList
- QMap
- QHash
- QStringList
- QTextStream
- QMimeType and QMimeDatabase
- QFile (Serialization I)
- QFile (Serialization II - Class)
- Tool Tips in HTML Style and with Resource Images
- QPainter
- QBrush and QRect
- QPainterPath and QPolygon
- QPen and Cap Style
- QBrush and QGradient
- QPainter and Transformations
- QGraphicsView and QGraphicsScene
- Customizing Items by inheriting QGraphicsItem
- QGraphicsView Animation
- FFmpeg Converter using QProcess
- QProgress Dialog - Modal and Modeless
- QVariant and QMetaType
- QtXML - Writing to a file
- QtXML - QtXML DOM Reading
- QThreads - Introduction
- QThreads - Creating Threads
- Creating QThreads using QtConcurrent
- QThreads - Priority
- QThreads - QMutex
- QThreads - GuiThread
- QtConcurrent QProgressDialog with QFutureWatcher
- QSemaphores - Producer and Consumer
- QThreads - wait()
- MVC - ModelView with QListView and QStringListModel
- MVC - ModelView with QTreeView and QDirModel
- MVC - ModelView with QTreeView and QFileSystemModel
- MVC - ModelView with QTableView and QItemDelegate
- QHttp - Downloading Files
- QNetworkAccessManager and QNetworkRequest - Downloading Files
- Qt's Network Download Example - Reconstructed
- QNetworkAccessManager - Downloading Files with UI and QProgressDialog
- QUdpSocket
- QTcpSocket
- QTcpSocket with Signals and Slots
- QTcpServer - Client and Server
- QTcpServer - Loopback Dialog
- QTcpServer - Client and Server using MultiThreading
- QTcpServer - Client and Server using QThreadPool
- Asynchronous QTcpServer - Client and Server using QThreadPool
- Qt Quick2 QML Animation - A
- Qt Quick2 QML Animation - B
- Short note on Ubuntu Install
- OpenGL with QT5
- Qt5 Webkit : Web Browser with QtCreator using QWebView Part A
- Qt5 Webkit : Web Browser with QtCreator using QWebView Part B
- Video Player with HTML5 QWebView and FFmpeg Converter
- Qt5 Add-in and Visual Studio 2012
- Qt5.3 Installation on Ubuntu 14.04
- Qt5.5 Installation on Ubuntu 14.04
- Short note on deploying to Windows
Ph.D. / Golden Gate Ave, San Francisco / Seoul National Univ / Carnegie Mellon / UC Berkeley / DevOps / Deep Learning / Visualization