Spring Boot : Authentication - 2020

This section is based on Securing a Web Application.
Though this app implemented authentication, it hard-coded "user/password". So, it's not a complete version of authentication.
$ sudo add-apt-repository ppa:webupd8team/java
$ sudo apt-get update
$ sudo apt-get install oracle-java8-installer
To set a JAVA_HOME, we need to retrieve an info using the following command:
$ readlink -f $(which javac)
/usr/lib/jvm/java-8-oracle/bin/javac
Now, let's set a new JAVA_HOME in ~/.bashrc:
export JAVA_HOME=/usr/lib/jvm/java-8-oracle
Run the script:
$ source ~/.bashrc
Let's get the source code:
git clone https://github.com/spring-guides/gs-securing-web.git
cd into gs-securing-web/initial:
$ cd gs-securing-web/initial
We can build a single executable JAR file that contains all the necessary dependencies, classes, and resources. This makes it easy to ship, version, and deploy the service as an application throughout the development lifecycle, across different environments, and so forth:
$ ./gradlew build
Then we can run the JAR file:
$ java -jar build/libs/gs-securing-web-0.1.0.jar
  .   ____          _            __ _ _
 /\\ / ___'_ __ _ _(_)_ __  __ _ \ \ \ \
( ( )\___ | '_ | '_| | '_ \/ _` | \ \ \ \
 \\/  ___)| |_)| | | | | || (_| |  ) ) ) )
  '  |____| .__|_| |_|_| |_\__, | / / / /
 =========|_|==============|___/=/_/_/_/
 :: Spring Boot ::        (v1.3.2.RELEASE)
...
Note that we can also run the application using ./gradlew bootRun
Here is initial build.gradle:
buildscript {
    repositories {
        mavenCentral()
    }
    dependencies {
        classpath("org.springframework.boot:spring-boot-gradle-plugin:1.3.2.RELEASE")
    }
}

apply plugin: 'java'
apply plugin: 'eclipse'
apply plugin: 'idea'
apply plugin: 'spring-boot'

jar {
    baseName = 'gs-securing-web'
    version =  '0.1.0'
}

repositories {
    mavenCentral()
}

sourceCompatibility = 1.8
targetCompatibility = 1.8

dependencies {
    compile("org.springframework.boot:spring-boot-starter-thymeleaf")
    testCompile("junit:junit")
}

task wrapper(type: Wrapper) {
    gradleVersion = '2.3'
}
Before we apply security to a web application, we need a web application to secure.
We'll create a very simple web application, and then we secure it with Spring Security in the next section.
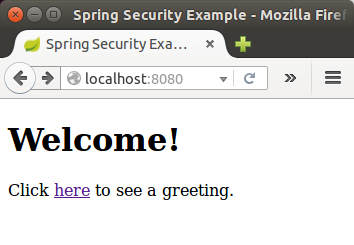
The web application includes two simple views: a home page and a "Hello World" page.
The src/main/resources/templates/home.html page is defined in the following Thymeleaf template:
<!DOCTYPE html>
<html xmlns="http://www.w3.org/1999/xhtml" xmlns:th="http://www.thymeleaf.org" xmlns:sec="http://www.thymeleaf.org/thymeleaf-extras-springsecurity3">
    <head>
        <title>Spring Security Example</title>
    </head>
    <body>
        <h1>Welcome!</h1>

        <p>Click <a th:href="@{/hello}">here</a> to see a greeting.</p>
    </body>
</html>
As we can see, this simple view include a link to the page at "/hello" which is defined in the following Thymeleaf template (src/main/resources/templates/hello.html):
<!DOCTYPE html>
<html xmlns="http://www.w3.org/1999/xhtml" xmlns:th="http://www.thymeleaf.org"
      xmlns:sec="http://www.thymeleaf.org/thymeleaf-extras-springsecurity3">
    <head>
        <title>Hello World!</title>
    </head>
    <body>
        <h1>Hello world!</h1>
    </body>
</html>
Because the web application is based on Spring MVC, we need to configure Spring MVC and set up view controllers to expose these templates. Here's a configuration (src/main/java/hello/MvcConfig.java) class for configuring Spring MVC in the application:
package hello;

import org.springframework.context.annotation.Configuration;
import org.springframework.web.servlet.config.annotation.ViewControllerRegistry;
import org.springframework.web.servlet.config.annotation.WebMvcConfigurerAdapter;

@Configuration
public class MvcConfig extends WebMvcConfigurerAdapter {

    @Override
    public void addViewControllers(ViewControllerRegistry registry) {
        registry.addViewController("/home").setViewName("home");
        registry.addViewController("/").setViewName("home");
        registry.addViewController("/hello").setViewName("hello");
        registry.addViewController("/login").setViewName("login");
    }

}
The addViewControllers() method (overriding the method of the same name in WebMvcConfigurerAdapter) adds four view controllers.
Two of the view controllers reference the view whose name is "home" (defined in home.html), and another references the view named "hello" (defined in hello.html).
The fourth view controller references another view named "login".
We'll create that view in the next section.
At this point, as it's done in the previous section, we could jump ahead to Make the application executable and run the application without having to login to anything.
With the base simple web application created, we can add security to it.
Suppose that we want to prevent unauthorized users from viewing the greeting page at "/hello".
As it is now, if users click the link on the home page, they see the greeting with no barriers to stop them. We need to add a barrier that forces the user to sign in before seeing that page.
We do that by configuring Spring Security in the application. If Spring Security is on the classpath, the Spring Boot automatically secures all HTTP endpoints with "basic" authentication.
. But we can further customize the security settings.The first thing we need to do is add Spring Security to the classpath. With Gradle this would be one line in the dependencies closure :
buildscript {
    repositories {
        mavenCentral()
    }
    dependencies {
        classpath("org.springframework.boot:spring-boot-gradle-plugin:1.3.2.RELEASE")
    }
}

apply plugin: 'java'
apply plugin: 'eclipse'
apply plugin: 'idea'
apply plugin: 'spring-boot'

jar {
    baseName = 'gs-securing-web'
    version =  '0.1.0'
}

repositories {
    mavenCentral()
}

sourceCompatibility = 1.8
targetCompatibility = 1.8

dependencies {
    compile("org.springframework.boot:spring-boot-starter-thymeleaf")
    testCompile("junit:junit")

    compile("org.springframework.boot:spring-boot-starter-security")
}

task wrapper(type: Wrapper) {
    gradleVersion = '2.1'
}
Here's a security configuration that ensures that only authenticated users can see the secret greeting ( src/main/java/hello/WebSecurityConfig.java):
package hello;

import org.springframework.beans.factory.annotation.Autowired;
import org.springframework.context.annotation.Configuration;
import org.springframework.security.config.annotation.authentication.builders.AuthenticationManagerBuilder;
import org.springframework.security.config.annotation.web.builders.HttpSecurity;
import org.springframework.security.config.annotation.web.configuration.WebSecurityConfigurerAdapter;
import org.springframework.security.config.annotation.web.configuration.EnableWebSecurity;

@Configuration
@EnableWebSecurity
public class WebSecurityConfig extends WebSecurityConfigurerAdapter {
    @Override
    protected void configure(HttpSecurity http) throws Exception {
        http
            .authorizeRequests()
                .antMatchers("/", "/home").permitAll()
                .anyRequest().authenticated()
                .and()
            .formLogin()
                .loginPage("/login")
                .permitAll()
                .and()
            .logout()
                .permitAll();
    }

    @Autowired
    public void configureGlobal(AuthenticationManagerBuilder auth) throws Exception {
        auth
            .inMemoryAuthentication()
                .withUser("user").password("password").roles("USER");
    }
}
The WebSecurityConfig class is annotated with @EnableWebMvcSecurity to enable Spring Security's web security support and provide the Spring MVC integration. It also extends WebSecurityConfigurerAdapter and overrides a couple of its methods to set some specifics of the web security configuration.
The configure(HttpSecurity) method defines which URL paths should be secured and which should not. Specifically, the "/" and "/home" paths are configured to not require any authentication. All other paths must be authenticated.
When a user successfully logs in, they will be redirected to the previously requested page that requires authentication. There is a custom /login page specified by loginPage(), and everyone is allowed to view it.
As for the configureGlobal(AuthenticationManagerBuilder) method, it sets up an in-memory user store with a single user. That user is given a username of "user", a password of "password", and a role of "USER".
Now we need to create the login page. There's already a view controller for the login view, so we only need to create the login view itself (src/main/resources/templates/login.html):
<!DOCTYPE html>
<html xmlns="http://www.w3.org/1999/xhtml" xmlns:th="http://www.thymeleaf.org"
      xmlns:sec="http://www.thymeleaf.org/thymeleaf-extras-springsecurity3">
    <head>
        <title>Spring Security Example </title>
    </head>
    <body>
        <div th:if="${param.error}">
            Invalid username and password.
        </div>
        <div th:if="${param.logout}">
            You have been logged out.
        </div>
        <form th:action="@{/login}" method="post">
            <div><label> User Name : <input type="text" name="username"/> </label></div>
            <div><label> Password: <input type="password" name="password"/> </label></div>
            <div><input type="submit" value="Sign In"/></div>
        </form>
    </body>
</html>
As we can see, this Thymeleaf template simply presents a form that captures a username and password and posts them to /login. As configured, Spring Security provides a filter that intercepts that request and authenticates the user.
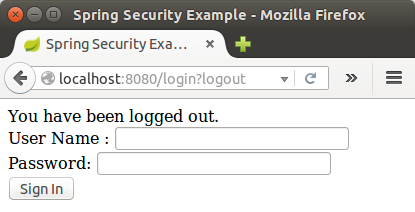
If the user fails to authenticate, the page is redirected to /login?error and our page displays the appropriate error message. Upon successfully signing out, our application is sent to /login?logout and our page displays the appropriate success message.
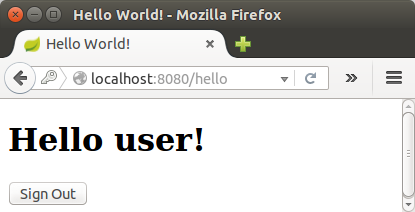
Lastly, we need to provide the user a way to display the current username and Sign Out. Update the src/main/resources/templates/hello.html to say hello to the current user and contain a "Sign Out" form as shown below:
<!DOCTYPE html>
<html xmlns="http://www.w3.org/1999/xhtml" xmlns:th="http://www.thymeleaf.org"
      xmlns:sec="http://www.thymeleaf.org/thymeleaf-extras-springsecurity3">
    <head>
        <title>Hello World!</title>
    </head>
    <body>
        <h1 th:inline="text">Hello [[${#httpServletRequest.remoteUser}]]!</h1>
        <form th:action="@{/logout}" method="post">
            <input type="submit" value="Sign Out"/>
        </form>
    </body>
</html>
We display the username by using Spring Security's integration with HttpServletRequest#getRemoteUser().
The "Sign Out" form submits a POST to /logout.
Upon successfully logging out it will redirect the user to /login?logout.
Although it is possible to package this service as a traditional web application archive or WAR file for deployment to an external application server, the simpler approach demonstrated below creates a standalone application.
We package everything in a single, executable JAR file, driven by a good old Java main() method.
And along the way, we use Spring's support for embedding the Tomcat servlet container as the HTTP runtime, instead of deploying to an external instance.
src/main/java/hello/Application.java:
package hello;

import org.springframework.boot.SpringApplication;
import org.springframework.boot.autoconfigure.SpringBootApplication;

@SpringBootApplication
public class Application {

    public static void main(String[] args) throws Throwable {
        SpringApplication.run(Application.class, args);
    }

}
@SpringBootApplication is a convenience annotation that adds all of the following:
- @Configuration tags the class as a source of bean definitions for the application context.
- @EnableAutoConfiguration tells Spring Boot to start adding beans based on classpath settings, other beans, and various property settings.
- Normally we would add @EnableWebMvc for a Spring MVC app, but Spring Boot adds it automatically when it sees spring-webmvc on the classpath. This flags the application as a web application and activates key behaviors such as setting up a DispatcherServlet.
- @ComponentScan tells Spring to look for other components, configurations, and services in the the hello package.
The main() method uses Spring Boot's SpringApplication.run() method to launch an application. Notice that there wasn't a single line of XML, No web.xml file either. This web application is 100% pure Java and we didn't have to deal with configuring any plumbing or infrastructure.
We can run the application using ./gradlew bootRun:
$ ./gradlew bootRun
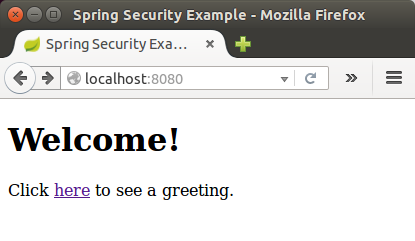
When we click on the link, it attempts to take us to the greeting page at /hello.
But because that page is secured and we have not yet logged in, it takes us to the login page:

At the login page, sign in as the test user by entering "user" and "password" for the username and password fields, respectively. Once we submit the login form, we are authenticated and then taken to the greeting page:
If we click on the "Sign Out" button, our authentication is revoked, and we're returned to the log in page with a message indicating you are logged out:
Ph.D. / Golden Gate Ave, San Francisco / Seoul National Univ / Carnegie Mellon / UC Berkeley / DevOps / Deep Learning / Visualization