JUnit 4 Tutorial: Maven Java 7 - 2020

In this tutorial, we will learn how to implement and execute unit testing, using the JUnit Framework and Maven.
Maven is a build automation tool used primarily for Java projects. Maven addresses two aspects of building software:
- It describes how software is built.
- It describes its dependencies.
Contrary to preceding tools like Apache Ant, Maven uses conventions for the build procedure, and only exceptions need to be written down.
The answer to "What is Maven?" depends on whom we we ask:
- Majority of
Mavenusers are going to callMavena "build tool" that is used to build deployable artifacts from source code. A build tool such asAntis focused solely on preprocessing, compilation, packaging, testing, and distribution. - Build engineers and projects managers may consider Maven as something more comprehensive: a "project management tool".
A project management tool such as
Mavenprovides not only features found in a build tool but also features of running reports, generating a web site, executing unit testing and much more. The concept of testing is built right into theMavenlifecycle.
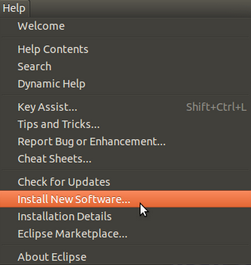
Click on the Help menu and then click on Install New Software...
In the next window, click on the Maven Integration for Eclipse check-box.
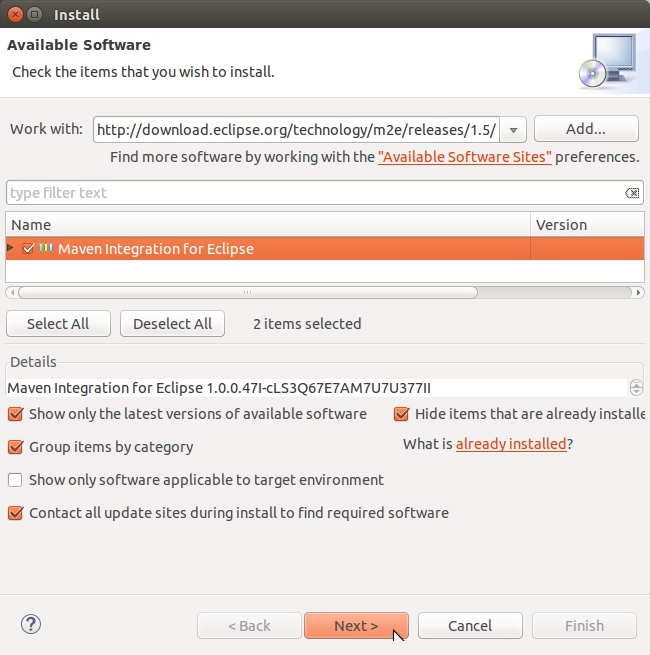
Then click on Next.

Finish and our Eclipse may need to be restarted.
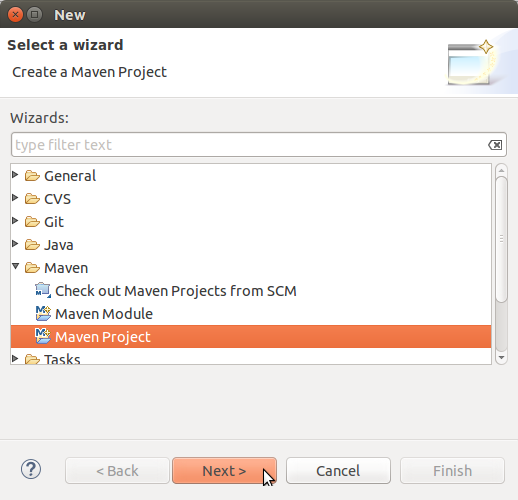
Click on the File => New => Other... menu, select Maven Project option and click on the Next button:
Click Next => Next:
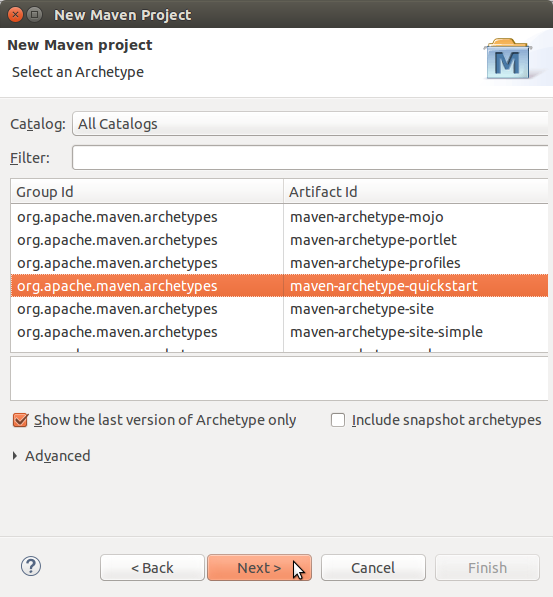
We need to type the Group Id, Artifact Id and Package as in the following screen and click on Finish.

Eclipse gives us this:

We want to change the JRE System Library used by Maven, from version 1.5 to version 1.7 by adding the following lines to our pom.xml file:
<project xmlns="http://maven.apache.org/POM/4.0.0" xmlns:xsi="http://www.w3.org/2001/XMLSchema-instance"
  xsi:schemaLocation="http://maven.apache.org/POM/4.0.0 http://maven.apache.org/xsd/maven-4.0.0.xsd">
  <modelVersion>4.0.0</modelVersion>

  <groupId>com.bogotobogo.examples</groupId>
  <artifactId>junitmavenexample</artifactId>
  <version>0.0.1-SNAPSHOT</version>
  <packaging>jar</packaging>

  <name>junitmavenexample</name>
  <url>http://maven.apache.org</url>

  <properties>
    <project.build.sourceEncoding>UTF-8</project.build.sourceEncoding>
  </properties>

  <dependencies>
    <dependency>
      <groupId>junit</groupId>
      <artifactId>junit</artifactId>
      <version>3.8.1</version>
      <scope>test</scope>
    </dependency>
  </dependencies>

  <build>
    <plugins>
      <plugin>
        <groupId>org.apache.maven.plugins</groupId>
        <artifactId>maven-compiler-plugin</artifactId>
        <version>3.1</version>
          <configuration>
            <source>1.7</source>
            <target>1.7</target>
          </configuration>
      </plugin>
    </plugins>
  </build>
</project>
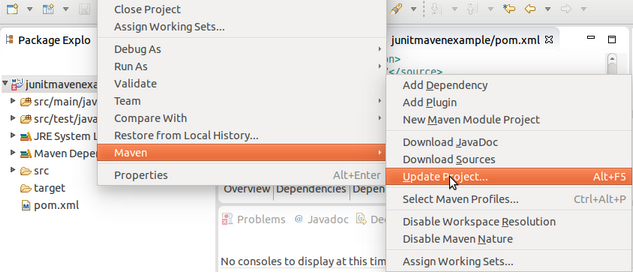
Then, right click on the name of the Project, click on the Maven menu option and then click on the Update Project... menu option:
In the next window, just click on the OK button, then we can see the Project JRE has changed to version 1.7:

Finally, because we want to use JUnit 4, we need to modify the version of the JUnit library by modifying our pom.xml file and change the version from 3.8.11 to 4.11:
<project xmlns="http://maven.apache.org/POM/4.0.0" xmlns:xsi="http://www.w3.org/2001/XMLSchema-instance"
  xsi:schemaLocation="http://maven.apache.org/POM/4.0.0 http://maven.apache.org/xsd/maven-4.0.0.xsd">
  <modelVersion>4.0.0</modelVersion>

  <groupId>com.bogotobogo.examples</groupId>
  <artifactId>junitmavenexample</artifactId>
  <version>0.0.1-SNAPSHOT</version>
  <packaging>jar</packaging>

  <name>junitmavenexample</name>
  <url>http://maven.apache.org</url>

  <properties>
    <project.build.sourceEncoding>UTF-8</project.build.sourceEncoding>
  </properties>

  <dependencies>
    <dependency>
      <groupId>junit</groupId>
      <artifactId>junit</artifactId>
      <version>4.11</version>
      <scope>test</scope>
    </dependency>
  </dependencies>

  <build>
    <plugins>
      <plugin>
        <groupId>org.apache.maven.plugins</groupId>
        <artifactId>maven-compiler-plugin</artifactId>
        <version>3.1</version>
          <configuration>
            <source>1.7</source>
            <target>1.7</target>
          </configuration>
      </plugin>
    </plugins>
  </build>
</project>
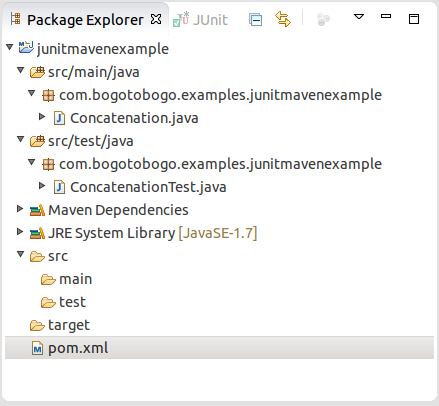
Here is how our file structure looks like:
Concatenation.java
package com.bogotobogo.examples.junitmavenexample;

public class Concatenation {
    public String concat(String s1, String s2) {
	return s1 + s2;
    }
}
ConcatenationTest.java
package com.bogotobogo.examples.junitmavenexample;
import static org.junit.Assert.*;

import org.junit.Test;

public class ConcatenationTest {

    @Test
    public void testConcat() {
	Concatenation myConcat = new Concatenation();
        String result = myConcat.concat("Hello", "World");
        assertEquals("HelloWorld", result);
    }

}
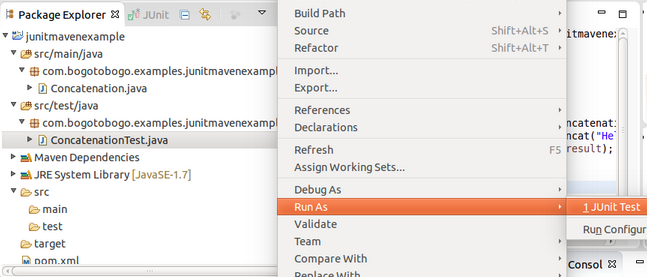
To execute our tests, we can right click on the name of our class (ConcatenationTest.java), then click on Run As and finally click on JUnit Test:
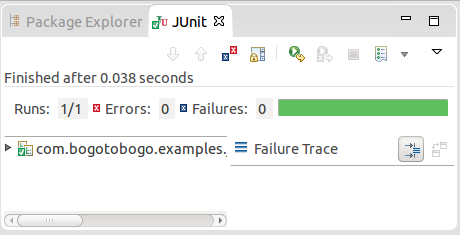
This figure indicates we pass the JUnit test!
Project file is available here: junitmavenexample.tar.gz
JUnit & Maven Tutorial
Ph.D. / Golden Gate Ave, San Francisco / Seoul National Univ / Carnegie Mellon / UC Berkeley / DevOps / Deep Learning / Visualization