Spring Boot : Hello World with Gradle 2 - 2020

By default, Spring Boot 1.3.2.RELEASE requires Java 7 and Spring Framework 4.1.5 or above. Spring Boot can be used with "classic" Java development tools or installed as a command line tool. Regardless, we will need Java SDK v1.6 or higher
$ java -version
java version "1.7.0_79"
OpenJDK Runtime Environment (IcedTea 2.5.6) (7u79-2.5.6-0ubuntu1.14.04.1)
OpenJDK 64-Bit Server VM (build 24.79-b02, mixed mode)
Maven install:
$ sudo apt-add-repository ppa:andrei-pozolotin/maven3
$ sudo apt-get update
$ sudo apt-get install maven3

$ maven -version
Apache Maven 3.2.5 (12a6b3acb947671f09b81f49094c53f426d8cea1; 2014-12-14T09:29:23-08:00)
Maven home: /home/k/java/apache-maven-3.2.5
Java version: 1.7.0_79, vendor: Oracle Corporation
Java home: /usr/lib/jvm/java-7-openjdk-amd64/jre
Default locale: en_US, platform encoding: UTF-8
OS name: "linux", version: "3.13.0-40-generic", arch: "amd64", family: "unix"
Gradle install:
$ sudo add-apt-repository ppa:cwchien/gradle
$ sudo apt-get update
$ sudo apt-get install gradle

$ gradle -version

------------------------------------------------------------
Gradle 2.11
------------------------------------------------------------

Build time:   2016-02-08 07:59:16 UTC
Build number: none
Revision:     584db1c7c90bdd1de1d1c4c51271c665bfcba978

Groovy:       2.4.4
Ant:          Apache Ant(TM) version 1.9.3 compiled on December 23 2013
JVM:          1.7.0_79 (Oracle Corporation 24.79-b02)
OS:           Linux 3.13.0-40-generic amd64
We need to configure our project's directory structure. Spring Boot, whether we're using Gradle or Maven, both follow the classic convention for directory naming and source structure.
$ mkdir -p myproject-gradle/src/main/java/hello
First we want to set up a basic build script.
Though we can use any build system we like when building apps with Spring, in this section, we'll use Gradle following Building an Application with Spring Boot.
build.gradle:
buildscript {
    repositories {
        mavenCentral()
    }
    dependencies {
        classpath("org.springframework.boot:spring-boot-gradle-plugin:1.3.2.RELEASE")
    }
}

apply plugin: 'java'
apply plugin: 'eclipse'
apply plugin: 'idea'
apply plugin: 'spring-boot'

jar {
    baseName = 'gs-spring-boot'
    version =  '0.1.0'
}

repositories {
    mavenCentral()
}

sourceCompatibility = 1.7
targetCompatibility = 1.7

dependencies {
    // tag::jetty[]
    compile("org.springframework.boot:spring-boot-starter-web") {
        exclude module: "spring-boot-starter-tomcat"
    }
    compile("org.springframework.boot:spring-boot-starter-jetty")
    // end::jetty[]
    // tag::actuator[]
    compile("org.springframework.boot:spring-boot-starter-actuator")
    // end::actuator[]
    testCompile("junit:junit")
}

task wrapper(type: Wrapper) {
    gradleVersion = '2.11'
}
The 'buildscript' closure sets up the build itself. This is where the plugins used by the build are declared, along with the repositories in which they can be found.
As we can see from the file, there are several plugin applications:
- The java plugin provides the basic tasks related to a simple java project - compiling and packaging, among others.
- The eclipse and idea plugins allow project files to be created for eclipse and Intellij, respectively.
- The spring-boot plugin contains tasks that build executable jars and execute them using embedded tomcat using tasks like bootRun, which we'll use often in these tutorials.
Next the repositories closure is used to declare where the project's dependencies will be found followed by dependencies closure that contains the jars required by the project.
The task wrapper - which is used to enforce the version of gradle being used on the project, as well as allow easy execution of the build by users who do not have gradle installed.
In the our project root, let's create a file called Application.java.
src/main/java/hello/Application.java:
package hello;

import java.util.Arrays;

import org.springframework.boot.SpringApplication;
import org.springframework.boot.autoconfigure.SpringBootApplication;
import org.springframework.context.ApplicationContext;

@SpringBootApplication
public class Application {

    public static void main(String[] args) {
        ApplicationContext ctx = SpringApplication.run(Application.class, args);

        System.out.println("Let's inspect the beans provided by Spring Boot:");

        String[] beanNames = ctx.getBeanDefinitionNames();
        Arrays.sort(beanNames);
        for (String beanName : beanNames) {
            System.out.println(beanName);
        }
    }
}
Here is out new directory structure:
myproject-gradle/
|-- build.gradle
|-- src
    |-- main
        |-- java
            |-- hello
                |-- Application.java
The annotations are marker interfaces used to alert the framework that this is a Spring config file (@Configuration), that we'd like to scan for beans to load in the current and child packages (@ComponentScan) and that we'd like to use auto configuration settings (@EnableAutoConfiguration).
Auto configuration in Spring Boot takes the concept of convention over configuration to an almost Rails or Grails-like level. It provides basic configuration of an application - where to find properties files, how properties files are named when using Spring Profiles, configuration a DispatcherServlet (note the lack of web.xml), and much more.
It is worth it to look further into what auto configuration is providing to insure our application does not conflict with it, especially if we're planning on deploying to containers that also provide libraries on the class path by default.
The main method simply allows the application to be executed from the command line. This includes the startup of our embedded container (in our case, Tomcat).
It's worth mentioning here that the return type of SpringApplication.run is an ApplicationContext object which can be further manipulated.
We'll develop our app using a sample controller configuration as a RestController to verify our app is functioning correctly.
In our source root, let's create a file, src/main/java/hello/HelloController.java:
package hello;
import org.springframework.web.bind.annotation.RestController;
import org.springframework.web.bind.annotation.RequestMapping;
@RestController
public class HelloController {
@RequestMapping("/")
public String index() {
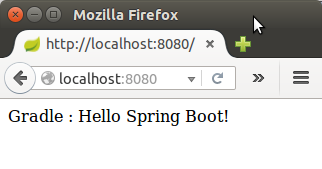
return "Gradle : Hello Spring Boot!";
}
}
Here is our project directory structure:
myproject-gradle
â-- build.gradle
â-- src
â-- main
â-- java
â-- HelloGradle.java
â-- MyController.java
The RestController interface declares just that - a RESTful controller.
This controller will return strings instead of views by default. The RequestMapping annotation on the only method in this class should be familiar, too. This calls for the controller to respond to requests at "/" by executing the index() method.
In this case, we're responding with a simple String.
At this point our application should work.
To execute the app, we may want to use gradle bootRun:
  .   ____          _            __ _ _
 /\\ / ___'_ __ _ _(_)_ __  __ _ \ \ \ \
( ( )\___ | '_ | '_| | '_ \/ _` | \ \ \ \
 \\/  ___)| |_)| | | | | || (_| |  ) ) ) )
  '  |____| .__|_| |_|_| |_\__, | / / / /
 =========|_|==============|___/=/_/_/_/
 :: Spring Boot ::        (v1.3.2.RELEASE)
...
Our directory structure:
$ tree myproject-gradle
myproject-gradle
â-- build
â  â-- classes
â  â  â-- main
â  â  â-- hello
â  â  â-- Application.class
â  â  â-- HelloController.class
â  â-- dependency-cache
â  â-- tmp
â  â-- compileJava
â  â-- emptySourcePathRef
â-- build.gradle
â-- src
â-- main
â-- java
â-- hello
â-- Application.java
â-- HelloController.java
Ph.D. / Golden Gate Ave, San Francisco / Seoul National Univ / Carnegie Mellon / UC Berkeley / DevOps / Deep Learning / Visualization