Flask blog app tutorial 1 : Signup page

Here are the files we'll be creating in this tutorial part-1:
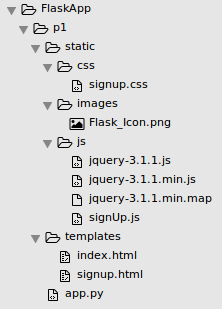
They are available from FlaskApp/p1
This tutorial is based on Creating a Web App From Scratch Using Python Flask and MySQL
We're going to use virtualenvwrapper" and create our virtualenv venv1 that we'll work on:
k@laptop:~/MySites/etaman$ mkvirtualenv venv1
New python executable in /home/k/Envs/venv1/bin/python
Installing setuptools, pip, wheel...done.
virtualenvwrapper.user_scripts creating /home/k/Envs/venv1/bin/predeactivate
virtualenvwrapper.user_scripts creating /home/k/Envs/venv1/bin/postdeactivate
virtualenvwrapper.user_scripts creating /home/k/Envs/venv1/bin/preactivate
virtualenvwrapper.user_scripts creating /home/k/Envs/venv1/bin/postactivate
virtualenvwrapper.user_scripts creating /home/k/Envs/venv1/bin/get_env_details
Let's install Flask with pip package manager:
(venv1) k@laptop:~/MySites/etaman$ pip install flask
Once the Flask is installed, we want to make a folder, FlaskApp:
(venv1) k@laptop:~/MySites/etaman$ mkdir -p FlaskApp/p1
(venv1) k@laptop:~/MySites/etaman$ cd FlaskApp/p1
Then, let's create a file called app.py: that looks like this:
from flask import Flask
app = Flask(__name__)
# basic route
@app.route("/")
def main():
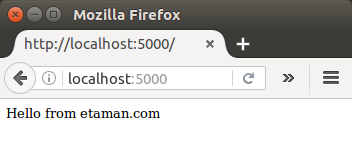
return "Hello from etaman.com"
if __name__ == "__main__":
app.run()
We import the flask module and create an app using Flask. Then, we defined the basic route / and its corresponding request handler. Next, we checked if the executed file is the main program and run the app.
Let's execute the app:
(venv1) k@laptop:~/MySites/etaman/FlaskApp/p1$ python app.py
Go to browser, type in http://localhost:5000/. Then, we should have the welcome page:
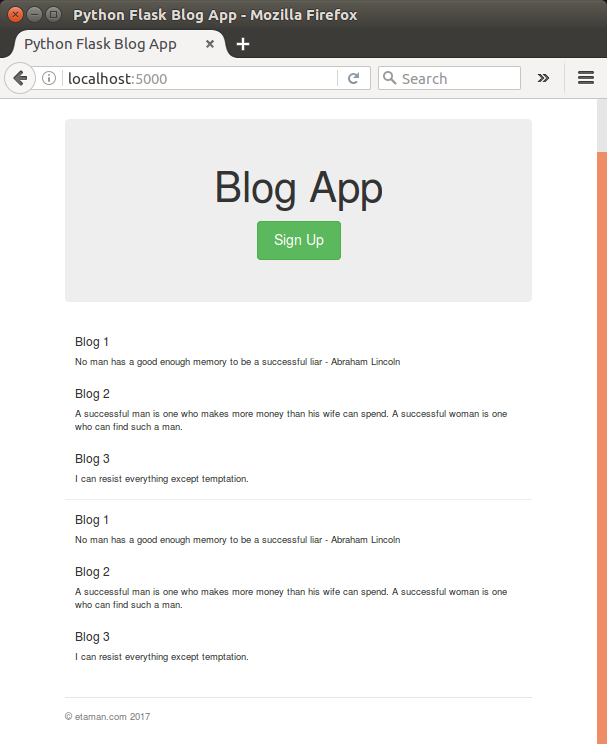
Our home page should show the latest posts added by users. Since Flask looks for template files inside the templates folder. So, we need to create the folder and under that folder, we should create index.html that looks like this:
<!DOCTYPE html>
<html lang="en">

<head>
    <title>Python Flask Blog App</title>

    <link href="//getbootstrap.com/dist/css/bootstrap.min.css" rel="stylesheet">
    <link href="//getbootstrap.com/examples/jumbotron-narrow/jumbotron-narrow.css" rel="stylesheet">

</head>

<body>

    <div class="container">
        <div class="header">
            <nav>
                <ul class="nav nav-pills pull-right">
                    <li role="presentation" class="active"><a href="#">Home</a>
                    </li>
                    <li role="presentation"><a href="#">Sign In</a>
                    </li>
                    <li role="presentation"><a href="showSignUp">Sign Up</a>
                    </li>
                </ul>
            </nav>
            <h3 class="text-muted">Python Flask App</h3>
        </div>

        <div class="jumbotron">
            <h1>Blog App</h1>
            <p class="lead"></p>
            <p><a class="btn btn-lg btn-success" href="showSignUp" role="button">Sign Up</a>
            </p>
        </div>

        <div class="row marketing">
            <div class="col-lg-6">
                <h4>Blog 1</h4>
                <p>No man has a good enough memory to be a successful liar - Abraham Lincoln</p>

                <h4>Blog 2</h4>
                <p>A successful man is one who makes more money than his wife can spend. A successful woman is one who can find such a man.</p>

                <h4>Blog 3</h4>
                <p>I can resist everything except temptation.</p>

            <br>
            <hr>

            <div class="col-lg-6">
                <h4>Blog 1</h4>
                <p>No man has a good enough memory to be a successful liar - Abraham Lincoln</p>

                <h4>Blog 2</h4>
                <p>A successful man is one who makes more money than his wife can spend. A successful woman is one who can find such a man.</p>

                <h4>Blog 3</h4>
                <p>I can resist everything except temptation.</p>
            </div>
        </div>

        <footer class="footer">
            <p>© etaman.com 2017</p>
        </footer>

    </div>
</body>

</html>
To reflect the change, let's import render_template into app.py, which we'll use to render the template files and we also need to make the main() method to return the rendered template file.
app.py:
from flask import Flask, render_template
app = Flask(__name__)

@app.route("/")
def main():
   return render_template('index.html')

if __name__ == "__main__":
   app.run()
We'll use MySQL db.
Let's go into MySQL and create a database for our app, FlaskBlogApp:
(venv1) k@laptop:~/MySites/etaman/FlaskApp/p1$ mysql -u root -p
...
Server version: 5.7.16-0ubuntu0.16.04.1 (Ubuntu)
...
mysql> CREATE DATABASE FlaskBlogApp;
Query OK, 1 row affected (0.07 sec)
We need to create a table (blog_user) as well:
CREATE TABLE `FlaskBlogApp`.`blog_user` (
  `user_id` BIGINT NOT NULL AUTO_INCREMENT,
  `user_name` VARCHAR(45) NULL,
  `user_username` VARCHAR(45) NULL,
  `user_password` VARCHAR(85) NULL,
  PRIMARY KEY (`user_id`));
Check what we've done with our db:
mysql> use FlaskBlogApp
Reading table information for completion of table and column names
You can turn off this feature to get a quicker startup with -A

Database changed
mysql> show tables;
+------------------------+
| Tables_in_FlaskBlogApp |
+------------------------+
| blog_user              |
+------------------------+
1 row in set (0.00 sec)

mysql> describe blog_user;
+---------------+-------------+------+-----+---------+----------------+
| Field         | Type        | Null | Key | Default | Extra          |
+---------------+-------------+------+-----+---------+----------------+
| user_id       | bigint(20)  | NO   | PRI | NULL    | auto_increment |
| user_name     | varchar(45) | YES  |     | NULL    |                |
| user_username | varchar(45) | YES  |     | NULL    |                |
| user_password | varchar(85) | YES  |     | NULL    |                |
+---------------+-------------+------+-----+---------+----------------+
4 rows in set (0.03 sec)
We're going to use "stored procedures" for our Flask app to interact with the MySQL database. Since we've already created the table blog_user, we may want to create a stored procedure called sp_createUser to sign up a user.
In MySQL, let's run the following to make a stored procedure called sp_createUser:
DELIMITER $$
CREATE DEFINER=`root`@`localhost` PROCEDURE `sp_createUser`(
    IN p_name VARCHAR(20),
    IN p_username VARCHAR(20),
    IN p_password VARCHAR(85)
)
BEGIN
    IF ( select exists (select 1 from blog_user where user_username = p_username) ) THEN

        select 'Username Exists !!';

    ELSE

        insert into blog_user
        (
            user_name,
            user_username,
            user_password
        )
        values
        (
            p_name,
            p_username,
            p_password
        );

    END IF;
END$$
DELIMITER ;
Note that we set the p_password length = 85 since it will be hashed and it could be long.
When we create a stored procedure to create a user in the blog_user table, first we check if a user with the same username already exists. If it exists we throw an error to the user, otherwise we'll create the user in the user table.
We can check the stored procedure we created:
mysql> SHOW PROCEDURE STATUS WHERE db = 'FlaskBlogApp';
+--------------+-----------------------------+-----------+----------------+---------------------+---------------------+---------------+---------+----------------------+----------------------+--------------------+
| Db           | Name                        | Type      | Definer        | Modified            | Created             | Security_type | Comment | character_set_client | collation_connection | Database Collation |
+--------------+-----------------------------+-----------+----------------+---------------------+---------------------+---------------+---------+----------------------+----------------------+--------------------+
| FlaskBlogApp | sp_createUser               | PROCEDURE | root@localhost | 2016-12-02 09:07:41 | 2016-12-02 09:07:41 | DEFINER       |         | utf8                 | utf8_general_ci      | latin1_swedish_ci  |
+--------------+-----------------------------+-----------+----------------+---------------------+---------------------+---------------+---------+----------------------+----------------------+--------------------+
1 row in set (0.08 sec)
To drop the procedure:
mysql> use FlaskBlogApp;
mysql> DROP PROCEDURE IF EXISTS sp_createUser;
Here is FlaskBlogApp/templates/signup.html file:
<!DOCTYPE html>
<html lang="en">
  <head>
    <title>Python Flask Blog App</title>

    <link href="//getbootstrap.com/dist/css/bootstrap.min.css" rel="stylesheet">
    <link href="//getbootstrap.com/examples/jumbotron-narrow/jumbotron-narrow.css" rel="stylesheet">
    <link href="/static/css/signup.css" rel="stylesheet">
  </head>

  <body>

    <div class="container">
      <div class="header">
        <nav>
          <ul class="nav nav-pills pull-right">
            <li role="presentation" ><a href="main">Home</a></li>
            <li role="presentation"><a href="#">Sign In</a></li>
            <li role="presentation" class="active"><a href="#">Sign Up</a></li>
          </ul>
        </nav>
        <img src="/static/images/Flask_Icon.png" alt="Flask_Icon.png"/>
      </div>

      <div class="jumbotron">
        <h1>Blog App</h1>
        <form class="form-signin">
        <label for="inputName" class="sr-only">Name</label>
        <input type="name" name="inputName" id="inputName" class="form-control" placeholder="Name" required autofocus>
        <label for="inputEmail" class="sr-only">Email address</label>
        <input type="email" name="inputEmail" id="inputEmail" class="form-control" placeholder="Email address" required autofocus>
        <label for="inputPassword" class="sr-only">Password</label>
        <input type="password" name="inputPassword" id="inputPassword" class="form-control" placeholder="Password" required>

        <button id="btnSignUp" class="btn btn-lg btn-primary btn-block" type="button">Sign up</button>
      </form>
      </div>

      <footer class="footer">
        <p>©etaman.com 2017</p>
      </footer>

    </div>
  </body>
</html>
static/css/signup.css:
body {
  padding-top: 40px;
  padding-bottom: 40px;
}

.form-signin {
  max-width: 330px;
  padding: 15px;
  margin: 0 auto;
}
.form-signin .form-signin-heading,
.form-signin .checkbox {
  margin-bottom: 10px;
}
.form-signin .checkbox {
  font-weight: normal;
}
.form-signin .form-control {
  position: relative;
  height: auto;
  -webkit-box-sizing: border-box;
     -moz-box-sizing: border-box;
          box-sizing: border-box;
  padding: 10px;
  font-size: 16px;
}
.form-signin .form-control:focus {
  z-index: 2;
}
.form-signin input[type="email"] {
  margin-bottom: -1px;
  border-bottom-right-radius: 0;
  border-bottom-left-radius: 0;
}
.form-signin input[type="password"] {
  margin-bottom: 10px;
  border-top-left-radius: 0;
  border-top-right-radius: 0;
}
Let's add showSignUpIn() to app.py so that we can render the signup page once a request comes to /showSignUp():
from flask import Flask, render_template
app = Flask(__name__)

@app.route("/")
def main():
   return render_template('index.html')

@app.route('/showSignUp')
def showSignUp():
   return render_template('signup.html')

if __name__ == "__main__":
   app.run()
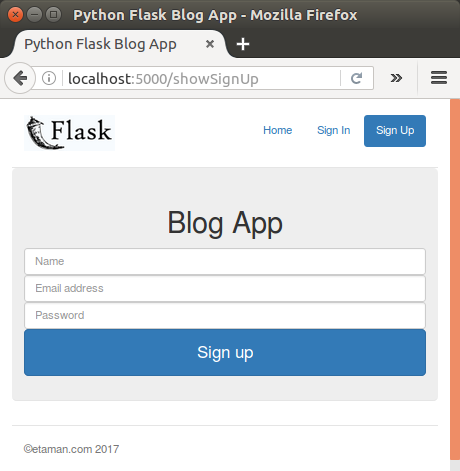
When we click on the Sign Up button on the home page and we should have the following signup page:
Now that we have Sign-up page, we need a server-side method for the form to interact with the MySQL database.
In app.py, let's create a new method signUp() and also add a route /signUp.
from flask import Flask, render_template, request, json
...
@app.route('/signUp',methods=['POST'])
def signUp():

    # read the posted values from the UI
    _name = request.form['inputName']
    _email = request.form['inputEmail']
    _password = request.form['inputPassword']

    # validate the received values
    if _name and _email and _password:
        return json.dumps({'html':'<span>All fields good !!</span>'})
    else:
        return json.dumps({'html':'<span>Enter the required fields</span>'})
We're going to use jQuery AJAX to post our signup data to the signUp() method, so we need to specify the method in the route definition. Note that in order to read the posted values we need to import request from Flask.
Once the values are read, we check the rceivd values are valid. At this stage, we're just return a simple message. Note also, we import json to return messages.
In order to send the signup request to the Python method, we're going to use jQuery AJAX. Download and place jQuery inside static/js:
(venv1) k@laptop:~/MySites/etaman/FlaskApp/p1/static/js$ wget https://code.jquery.com/jquery-3.1.1.min.js
(venv1) k@laptop:~/MySites/etaman/FlaskApp/p1/static/js$ wget https://code.jquery.com/jquery-3.1.1.js

(venv1) k@laptop:~/MySites/etaman/FlaskApp/p1/static/js$ wget https://code.jquery.com/jquery-3.1.1.min.map
We also need to add a link to it from the signup page. Once jQuery has been included, we'll add a jQuery POST request when the user clicks the Sign Up button.
Here is our js file FlaskApp/p1/static/js/signUp.js:
$(function() {
    $('#btnSignUp').click(function() {

        $.ajax({
            url: '/signUp',
            data: $('form').serialize(),
            type: 'POST',
            success: function(response) {
                console.log(response);
            },
            error: function(error) {
                console.log(error);
            }
        });
    });
});
Once jQuery has been included, we added a jQuery POST request to prepare for the usern's click on the Sign Up button.
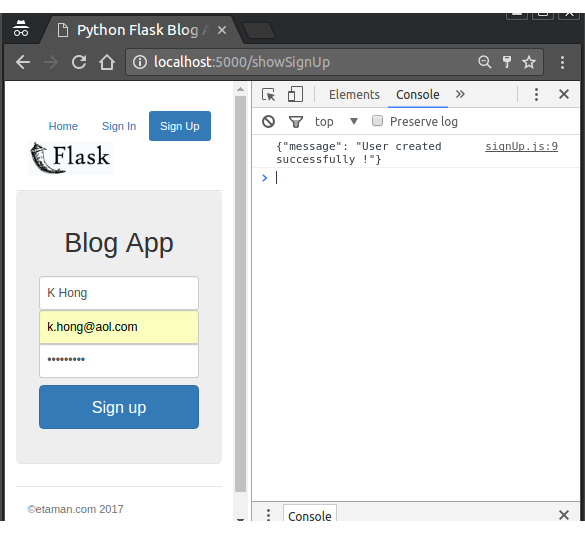
After filling out all fields, we get the following output from the browser console when the user push "Sign up" button:

Once we have the sign-up data: name, email address and password, we make a call to the MySQL stored procedure to create the new user.
To connect with MySQL from Flask, we need to install Flask-MySQL:
(venv1) k@laptop:~/MySites/etaman/FlaskApp/p1$ pip install flask-mysql
...
Successfully installed PyMySQL-0.7.9 flask-mysql-1.4.0
In app.py, we need to import, configure MySQL and get connected to it:
from flask import Flask, render_template, json, request
from flaskext.mysql import MySQL
from werkzeug import generate_password_hash, check_password_hash

mysql = MySQL()
app = Flask(__name__)

# MySQL configurations

app.config['MYSQL_DATABASE_USER'] = 'khong'
app.config['MYSQL_DATABASE_PASSWORD'] = 'khong'
app.config['MYSQL_DATABASE_DB'] = 'FlaskBlogApp'
app.config['MYSQL_DATABASE_HOST'] = 'localhost'
mysql.init_app(app)

@app.route('/')
def main():
    return render_template('index.html')

@app.route('/showSignUp')
def showSignUp():
    return render_template('signup.html')

@app.route('/signUp',methods=['POST','GET'])
def signUp():
    try:
        _name = request.form['inputName']
        _email = request.form['inputEmail']
        _password = request.form['inputPassword']

        # validate the received values
        if _name and _email and _password:

            # All Good, let's call MySQL

            conn = mysql.connect()
            cursor = conn.cursor()
            _hashed_password = generate_password_hash(_password)
            cursor.callproc('sp_createUser',(_name,_email,_hashed_password))
            data = cursor.fetchall()

            if len(data) is 0:
                conn.commit()
                return json.dumps({'message':'User created successfully !'})
            else:
                return json.dumps({'error':str(data[0])})
        else:
            return json.dumps({'html':'<span>Enter the required fields</span>'})

    except Exception as e:
        return json.dumps({'error':str(e)})
    finally:
        cursor.close()
        conn.close()

if __name__ == "__main__":
    app.run(port=5000)
As we can se from the code above, we create the MySQL connection:
conn = mysql.connect()
Once the connection is created, we require a cursor to query our stored procedure. So, using conn connection, create a cursor:
cursor = conn.cursor()
Before calling the create user stored procedure, we make our password salted using a helper provided by Werkzeug which is imported module which allows us to create the hashed password.
Then, we call the procedure sp_createUser:
cursor.callproc('sp_createUser',(_name,_email,_hashed_password))
If the procedure is executed successfully, swe can commit the changes and return the success message.
data = cursor.fetchall()

if len(data) is 0:
    conn.commit()
    return json.dumps({'message':'User created successfully !'})
else:
    return json.dumps({'error':str(data[0])})
Here is our output for the user signup:
We can check if it was really successful directly on MySQL:
mysql> use FlaskBlogApp;
Reading table information for completion of table and column names
You can turn off this feature to get a quicker startup with -A

Database changed
mysql> show tables;
+------------------------+
| Tables_in_FlaskBlogApp |
+------------------------+
| blog_user              |
+------------------------+
1 row in set (0.00 sec)

mysql> select * from blog_user;
+---------+-----------+----------------+--------------------------------------------------------------------+
| user_id | user_name | user_username  | user_password                                                      |
+---------+-----------+----------------+--------------------------------------------------------------------+
|       1 | K Hong    | k.hong@aol.com | pbkdf2:sha1:1000$xqS4d2GM$1f38b71fb7613bc8085f61db6c5b00ecc25deaf0 |
+---------+-----------+----------------+--------------------------------------------------------------------+
1 row in set (0.00 sec)
Ph.D. / Golden Gate Ave, San Francisco / Seoul National Univ / Carnegie Mellon / UC Berkeley / DevOps / Deep Learning / Visualization