BogoToBogo
  • Home
  • About
  • Big Data
  • Machine Learning
  • AngularJS
  • Python
  • C++
  • go
  • DevOps
  • Kubernetes
  • Algorithms
  • More...
    • Qt 5
    • Linux
    • FFmpeg
    • Matlab
    • Django 1.8
    • Ruby On Rails
    • HTML5 & CSS

Vagrant and Ansible

Vagrant_Icon.png


Bookmark and Share


bogotobogo.com site search:


Introduction

In this tutorial, we'll install our Flask app into a virtual machine with Vagrant using Ansible.

Vagrant is a tool to manage virtual machine environments, and allows us to configure and use reproducible work environments on top of various virtualization and cloud platforms.

Though Vagrant handles the generation and basic imaging of virtual machines to form isolated development environments, it doesn't do the provisioning of these virtual machines. So, it's up to us to handle the installation and configuration of the packages we want to work. Fortunately, Vagrant is easily integrates with existing provisioners such as Chef, Puppet, and Ansible. In this tutorial, we'll use Ansible for the configuration.

Once a virtual machine is generated and a provisioner is ready, we can quickly start a development environment on our machine without having to worry about finding, installing, and configuring project dependencies. Any developer can pickup a project and start working on it with little work with the same environment as everyone else.

In this tutorial, we'll go through the stages of setting up a Vagrant configuration for a virtual machine, and how to provision the virtual machine using Ansible playbooks.


What is Ansible?

We installed Vagrant and VirtualBox in VirtualBox and Vagrant.

Among popular configuration management tools such as Chef, Puppet, Salt, and Ansible, we chose Ansible because it has a much smaller overhead to get started. Ansible is agent-less which means no need of any agent installation on remote nodes, so with Ansible, there are no any background daemons or programs are executing for Ansible.

Ansible does not require any additional software to be installed on the client computers since Ansible communicates over normal SSH channels in order to retrieve information from remote machines, issue commands, and copy files. So, any computer that you can administer through SSH, we can also administer through Ansible. In other words, the controlling machine, where Ansible is installed and clients (nodes) are managed by this controlling machine over SSH. The location of nodes are specified by controlling machine through its inventory.

Ansible can interact with clients through either command line tools or through its configuration scripts called Playbooks.

The controlling machine deploys modules to nodes using SSH protocol and these modules are stored temporarily on remote nodes and communicate with the Ansible machine through a JSON connection over the standard output.


Install Ansible

We installed Vagrant and VirtualBox in VirtualBox and Vagrant.

Let's install Ansible.

$ sudo apt-get update
$ sudo apt-get install ansible

$ ansible --version
ansible 2.0.0.2
  config file = /etc/ansible/ansible.cfg
  configured module search path = Default w/o overrides

As mentioned earlier, there will be no daemons to start or keep running. We only needed to install it on one machine (my laptop), and it can manage an entire fleet of remote machines (or VirtualBox, in our case) from that central point.


Vagrant setup for Ansible

The first step once we've installed Vagrant is to create a Vagrantfile and customize it to use the Ansible provisioner to manage a single machine:

# This guide is optimized for Vagrant 1.7 and above.
# Although versions 1.6.x should behave very similarly, it is recommended
# to upgrade instead of disabling the requirement below.
Vagrant.require_version ">= 1.7.0"

Vagrant.configure(2) do |config|

  config.vm.box = "ubuntu/trusty64"

  config.vm.network "private_network", ip: "192.168.33.15"

  config.vm.provision "ansible" do |ansible|
    ansible.verbose = "v"
    ansible.playbook = "playbook.yml"
  end
end

A private network is created by VirtualBox between our host machine and the guest machine. The guest is assigned an IP address of 192.168.33.15 and our host machine is able to access it on that IP. An access from outside devices to this IP address is not available as the network interface is private to our host machine.

Notice the config.vm.provision section that refers to an Ansible playbook called playbook.yml in the same directory as the Vagrantfile. Vagrant runs the provisioner once the virtual machine has booted and is ready for SSH access.

Let's start the VM, and run the provisioning playbook (on the first VM startup):

$ vagrant up

It downloads the Ubuntu image that we specified as the config.vm.box value and create our server as a virtual machine.


To re-run a playbook on an existing VM, just run:

$ vagrant provision

This will re-run the playbook against the existing VM.

Note that having the ansible.verbose option enabled will instruct Vagrant to show the full ansible-playbook command used behind the scene.


Ansible Playbook

To automate the steps for deploying an app to a virtual machine, we will use Ansible. Essentially, it will log in to servers that we specify using 'ssh' and run commands on them.

Let's create a file called site.yml in the same folder as our Vagrantfile. This will be our Ansible playbook, and it will contain our automation steps. The 'site' implies that this is the only file needed to get a successful version of our site up and running. The '.yml' extension tells us that it's a YAML-formatted file which is Ansible's preference.

- name: Configure application
  hosts: all
  become: true
  become_method: sudo
  vars:
      repository_url: https://github.com/Einsteinish/flask-vagrant-ansible
      repository_path: /home/vagrant/flask-vagrant-ansible

  tasks:
    - name: Install packages
      apt: update_cache=yes name={{ item }} state=present
      with_items:
        - git
        - python-pip
        - nginx

    - name: Clone repository
      git: repo='{{ repository_url }}' dest='{{ repository_path }}'

    - name: Install requirements
      pip: requirements='{{ repository_path }}/requirements.txt'

Here are the description of the "site.yml" line by line:

  1. Give a human readable name to the overall step. This shows up in the terminal when we run it.
  2. Apply this playbook to all hosts that we know about.
  3. Run these commands as the superuser.
  4. Define some variables to use for the rest of the playbook. Ansible uses a template engine called Jinja2, so we can use these later to prevent repeating ourselves.
  5. The tasks directive is the meat of what we're actually doing.
  6. We're telling our package manager (apt) to install a set of packages. Jinja will replace the item variable (indicated by the braces in Jinja) with each of the items in the with_items block right below.
  7. Use git to clone our application to a directory of our choosing.
  8. Install the Python requirements from the "requirements.txt file".

Now that we defined out playbook for Ansible, we need to tell our VM to use it when setting itself up. Here is our Vagrantfile:

# Although Vagrant versions 1.6.x should behave very similarly, it is recommended
# to upgrade instead of disabling the requirement below.
Vagrant.require_version ">= 1.7.0"

Vagrant.configure(2) do |config|

  config.vm.box = "ubuntu/trusty64"

  config.vm.network "private_network", ip: "192.168.33.15"

  config.vm.provision "ansible" do |ansible|
    ansible.verbose = "v"
    ansible.playbook = "site.yml"
  end
end

The "Vagrantfile" is telling Vagrant to use the site.yml file we created and to use verbose output.

To check that our automation works, let's redo our VM from scratch. Tearing things down and reprovisioning them is a good way to make sure our automation completes all the necessary steps.

To destroy our VM, run vagrant destroy. After it's destroyed, type vagrant up to recreate the VM and to provision it in one go.

When it comes back up, we should be able to vagrant ssh into our VM and run the following to get our server up and going again:

vagrant@vagrant-ubuntu-trusty-64:~$ cd flask-hello-world
vagrant@vagrant-ubuntu-trusty-64:~$ python app.py
 * Running on http://0.0.0.0:5000/ (Press CTRL+C to quit)


Gunicorn

Gunicorn 'Green Unicorn' is a Python WSGI HTTP Server and we're going to use it.

Since we've already installed gunicorn via requirements.txt file, we should be able to run the following:

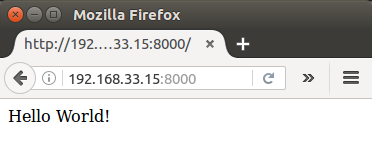
vagrant@vagrant-ubuntu-trusty-64:~$ cd flask-vagrant-ansible/

vagrant@vagrant-ubuntu-trusty-64:~$ gunicorn --bind 0.0.0.0:8000 app:app
[2017-02-09 19:25:15 +0000] [1746] [INFO] Starting gunicorn 19.4.5
[2017-02-09 19:25:15 +0000] [1746] [INFO] Listening at: http://0.0.0.0:8000 (1746)
[2017-02-09 19:25:15 +0000] [1746] [INFO] Using worker: sync
[2017-02-09 19:25:15 +0000] [1751] [INFO] Booting worker with pid: 1751

This will use gunicorn to serve our application through WSGI, which is the common way that Python web apps are served. It replaces our usual python app.py step, which is the simplest way to serve our application for now:

gunicorn-8000.png

Now we want to set up a script so that we can run our server automatically when our server restarts, crashes or is killed.

We'll do that with an upstart script. Upstart handles starting and stopping tasks.

In the VM, let's create /etc/init/hello-world.conf:

description "hello-world"

start on (filesystem)
stop on runlevel [016]

respawn
setuid nobody
setgid nogroup
chdir /home/vagrant/flask-vagrant-ansible

exec gunicorn app:app --bind 0.0.0.0:8000

Now that we've created the file, we should be able to run sudo service hello-world start to start the task, go to browser, and then view the service at http://192.168.33.10:8000, as before. The big difference is now we have something that will run it for us, so we don't need to SSH in to run our server.

Log out and issue vagrant up command on host machine:

$ vagrant up
Bringing machine 'default' up with 'virtualbox' provider...
==> default: Checking if box 'ubuntu/trusty64' is up to date...
==> default: A newer version of the box 'ubuntu/trusty64' is available! You currently
==> default: have version '20170202.0.0'. The latest is version '20170202.1.0'. Run
==> default: `vagrant box update` to update.
==> default: Machine already provisioned. Run `vagrant provision` or use the `--provision`
==> default: flag to force provisioning. Provisioners marked to run always will still run.

Now we don't have to do 'ssh' into virtual machine. Instead we can directly go to the browser and check if our app is running:

gunicorn-8000.png

Now that we have that set up, let's automate that process.


Upstart script in site.xml

To automate the step for upstart script, we need to modify our site.yml file.

We want to copy the hello-world.conf file that we created above onto our servers. In order to do that, we need a local copy using a variable instead of hard coding the path to our repository.

In the same directory as our site.yml file, create a new file: hello-world.upstart.j2. The .j2 extension indicates that we're going to be using it as a Jinja2 template.

Here is the new template file we'll write:

description "hello-world"

start on (filesystem)
stop on runlevel [016]

respawn
setuid nobody
setgid nogroup
chdir /home/vagrant/flask-vagrant-ansible

exec gunicorn app:app --bind 0.0.0.0:8000

Now that we have this template file, we'll need to set up Ansible to copy it into the same directory as we used when doing it manually.

Let's add a section to the bottom of our site.yml file in the tasks section:

    - name: Copy Upstart configuration
      template: src=hello-world.upstart.j2 dest=/etc/init/hello-world.conf

    - name: Make sure our server is running
      service: name=hello-world state=started

Note that we're using Ansible's template and service modules to accomplish our task. It's telling that we want to copy the template file that we defined into the directory that we used before. It will use the variables we have defined in our file, inject them into the template, and write them to the destination path we have defined.

Then, we want to make sure our service has started by running another vagrant provision on our host machine.

$ vagrant provision
==> default: Running provisioner: ansible...
    default: Running ansible-playbook...
PYTHONUNBUFFERED=1 ANSIBLE_FORCE_COLOR=true ANSIBLE_HOST_KEY_CHECKING=false ANSIBLE_SSH_ARGS='-o UserKnownHostsFile=/dev/null -o IdentitiesOnly=yes -o ControlMaster=auto -o ControlPersist=60s' ansible-playbook --connection=ssh --timeout=30 --limit="default" --inventory-file=/home/k/TEST/my_vagrant/.vagrant/provisioners/ansible/inventory -v site.yml
Using /etc/ansible/ansible.cfg as config file

PLAY [Configure application] ***************************************************

TASK [setup] *******************************************************************
ok: [default]

TASK [Install packages] ********************************************************
ok: [default] => (item=[u'git', u'python-pip', u'nginx']) => {"cache_update_time": 1486678781, "cache_updated": true, "changed": false, "item": ["git", "python-pip", "nginx"]}

TASK [Clone repository] ********************************************************
ok: [default] => {"after": "e660d88117debc864c3f988af18f966324851b04", "before": "e660d88117debc864c3f988af18f966324851b04", "changed": false}

TASK [Install requirements] ****************************************************
ok: [default] => {"changed": false, "cmd": "/usr/bin/pip install -r /home/vagrant/flask-vagrant-ansible/requirements.txt", "name": null, "requirements": "/home/vagrant/flask-vagrant-ansible/requirements.txt", "state": "present", "stderr": "", "stdout": "Requirement already satisfied (use --upgrade to upgrade): Flask==0.10.1 in /usr/local/lib/python2.7/dist-packages (from -r /home/vagrant/flask-vagrant-ansible/requirements.txt (line 1))\nRequirement already satisfied (use --upgrade to upgrade): gunicorn==19.4.5 in /usr/local/lib/python2.7/dist-packages (from -r /home/vagrant/flask-vagrant-ansible/requirements.txt (line 2))\nRequirement already satisfied (use --upgrade to upgrade): Werkzeug>=0.7 in /usr/local/lib/python2.7/dist-packages (from Flask==0.10.1->-r /home/vagrant/flask-vagrant-ansible/requirements.txt (line 1))\nRequirement already satisfied (use --upgrade to upgrade): Jinja2>=2.4 in /usr/local/lib/python2.7/dist-packages (from Flask==0.10.1->-r /home/vagrant/flask-vagrant-ansible/requirements.txt (line 1))\nRequirement already satisfied (use --upgrade to upgrade): itsdangerous>=0.21 in /usr/local/lib/python2.7/dist-packages (from Flask==0.10.1->-r /home/vagrant/flask-vagrant-ansible/requirements.txt (line 1))\nCleaning up...\n", "stdout_lines": ["Requirement already satisfied (use --upgrade to upgrade): Flask==0.10.1 in /usr/local/lib/python2.7/dist-packages (from -r /home/vagrant/flask-vagrant-ansible/requirements.txt (line 1))", "Requirement already satisfied (use --upgrade to upgrade): gunicorn==19.4.5 in /usr/local/lib/python2.7/dist-packages (from -r /home/vagrant/flask-vagrant-ansible/requirements.txt (line 2))", "Requirement already satisfied (use --upgrade to upgrade): Werkzeug>=0.7 in /usr/local/lib/python2.7/dist-packages (from Flask==0.10.1->-r /home/vagrant/flask-vagrant-ansible/requirements.txt (line 1))", "Requirement already satisfied (use --upgrade to upgrade): Jinja2>=2.4 in /usr/local/lib/python2.7/dist-packages (from Flask==0.10.1->-r /home/vagrant/flask-vagrant-ansible/requirements.txt (line 1))", "Requirement already satisfied (use --upgrade to upgrade): itsdangerous>=0.21 in /usr/local/lib/python2.7/dist-packages (from Flask==0.10.1->-r /home/vagrant/flask-vagrant-ansible/requirements.txt (line 1))", "Cleaning up..."], "version": null, "virtualenv": null}

PLAY RECAP *********************************************************************
default                    : ok=4    changed=0    unreachable=0    failed=0   

We can see it is working!

gunicorn-8000.png

Just to make it sure we can check if /etc/init/hello-world.conf file has been written.

For reference, here is our site.xml on our host machine:

- name: Configure application
  hosts: all
  become: true
  become_method: sudo
  vars:
      repository_url: https://github.com/Einsteinish/flask-vagrant-ansible
      repository_path: /home/vagrant/flask-vagrant-ansible

  tasks:
    - name: Install packages
      apt: update_cache=yes name={{ item }} state=present
      with_items:
        - git
        - python-pip
        - nginx

    - name: Clone repository
      git: repo='{{ repository_url }}' dest='{{ repository_path }}'

    - name: Install requirements
      pip: requirements='{{ repository_path }}/requirements.txt'

    - name: Copy Upstart configuration
      template: src=hello-world.upstart.j2 dest=/etc/init/hello-world.conf

    - name: Make sure our server is running
      service: name=hello-world state=started


Configuring nginx

With a new nginx configuration, we'll be able to access our server directly at 192.168.33.10 without specifying a port (8000) via proxy setup.

We'll write our file to /etc/nginx/sites-enabled/hello-world and it looks like this:

server {
    listen 80;

    location / {
        include proxy_params;
        proxy_pass http://unix:/tmp/hello_world.sock;
    }
}

The file tells nginx to look for our server a unix socket.

Let's kill any 'gunicorn' processes, and run it with the following:

vagrant@vagrant-ubuntu-trusty-64:~/flask-vagrant-ansible$ sudo gunicorn app:app --bind unix:/tmp/hello_world.sock --workers 3
[2017-02-10 00:15:51 +0000] [7456] [INFO] Starting gunicorn 19.4.5
[2017-02-10 00:15:51 +0000] [7456] [INFO] Listening at: unix:/tmp/hello_world.sock (7456)
[2017-02-10 00:15:51 +0000] [7456] [INFO] Using worker: sync
[2017-02-10 00:15:51 +0000] [7461] [INFO] Booting worker with pid: 7461
[2017-02-10 00:15:51 +0000] [7462] [INFO] Booting worker with pid: 7462
[2017-02-10 00:15:51 +0000] [7463] [INFO] Booting worker with pid: 7463

Since our gunicorn server will be running, the unix socket should be accessible.

Let's restart nginx server:

vagrant@vagrant-ubuntu-trusty-64:~$ sudo service nginx restart
Without-port.png

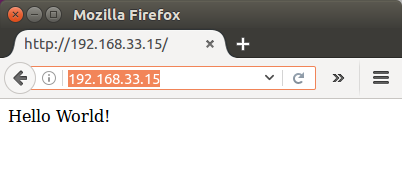
Now we can access our app not specifying a port!


We need to modify /etc/init/hello-world.conf accordingly. Here is our new upstart template file (hello-world.upstart.j2) that should be placed on our host machine:

description "hello-world"

start on (filesystem)
stop on runlevel [016]

respawn
setuid nobody
setgid nogroup
chdir /home/vagrant/flask-vagrant-ansible

exec gunicorn app:app --bind unix:/tmp/hello_world.sock --workers 3


Setting hostname

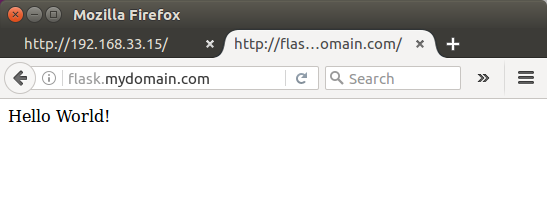
If we want to access our app via domain name such as "flask.mydomain.com", we may want to define it in Vagrantfile like this:

config.vm.hostname  = "flask.mydomain.com"

In my case, accessing my app using domain name only works only if I set it in /etc/hosts:

192.168.33.15 flask.mydomain.com

After "vagrant reload", we can visit our app to check if it works:

flask-mydomain-com.png


Setting CPUs

To get the max CPUs from host:

  config.vm.provider :virtualbox do |vb|
    # cpu_exec_cap = 50
    cpus = `nproc`.to_i
    vb.customize ["modifyvm", :id, "--cpus", cpus]
    #vb.customize ["modifyvm", :id, "--cpus", "2"]
  end

Then, we can check if we got the max cpu of host which is 2:

$ vagrant reload
$ vagrant ssh

vagrant@flask:~$ lscpu
Architecture:          x86_64
CPU op-mode(s):        32-bit, 64-bit
Byte Order:            Little Endian
CPU(s):                2
On-line CPU(s) list:   0,1
Thread(s) per core:    1
Core(s) per socket:    2
...


Setting timezone and locale

As an example, we set the timezone to US/Eastern:

    - name: set locale
      command: /usr/sbin/update-locale LANG=en_US.UTF-8 LC_ALL=en_US.UTF-8
      
    - name: set /etc/localtime
      file: src=/usr/share/zoneinfo/US/Eastern dest=/etc/localtime state=link force=yes

    - name: Update Timezone to America/New_York
      copy: content="America/New_York\n" dest=/etc/timezone owner=root group=root mode=0644
      register: timezone
      notify: update tzdata

  handlers:

    - name: update timezone
      command: dpkg-reconfigure --frontend noninteractive tzdata
      when: timezone.changed

Then provision the box:

$ vagrant provision
$ vagrant ssh
vagrant@flask:~$ date
Fri Feb 10 05:02:59 EST 2017


site.xml & nginx

In our directory where site.xml is, we should have the following files:

$ ls
hello-world.nginx.j2  hello-world.upstart.j2  site.yml  Vagrantfile

site.xml:

- name: Configure application
  hosts: all
  become: true
  become_method: sudo
  vars:
      repository_url: https://github.com/Einsteinish/flask-vagrant-ansible
      repository_path: /home/vagrant/flask-vagrant-ansible

  tasks:
    - name: Install packages
      apt: update_cache=yes name={{ item }} state=present
      with_items:
        - git
        - python-pip
        - nginx

    - name: Clone repository
      git: repo='{{ repository_url }}' dest='{{ repository_path }}'

    - name: Install requirements
      pip: requirements='{{ repository_path }}/requirements.txt'

    - name: Copy Upstart configuration
      template: src=hello-world.upstart.j2 dest=/etc/init/hello-world.conf

    - name: Make sure our server is running
      service: name=hello-world state=started

    - name: Copy Nginx site
      template: src=hello-world.nginx.j2 dest=/etc/nginx/sites-enabled/hello-world
      notify:
        - restart nginx

    - name: Remove any default sites
      file: path=/etc/nginx/sites-enabled/default state=absent
      notify:
        - restart nginx

    - name: Make sure nginx is running
      service: name=nginx state=started

  handlers:
    - name: restart nginx
      service: name=nginx state=restarted

hello-world.nginx.j2:

server {
    listen 80;

    location / {
        include proxy_params;
        proxy_pass http://unix:/tmp/hello_world.sock;
    }
}

hello-world.upstart.j2:

description "hello-world"

start on (filesystem)
stop on runlevel [016]

respawn
setuid nobody
setgid nogroup
chdir {{repository_path}}

exec gunicorn app:app --bind unix:/tmp/hello_world.sock --workers 3

Vagrantfile:

# This guide is optimized for Vagrant 1.7 and above.
# Although versions 1.6.x should behave very similarly, it is recommended
# to upgrade instead of disabling the requirement below.
Vagrant.require_version ">= 1.7.0"

Vagrant.configure(2) do |config|

  config.vm.box = "ubuntu/trusty64"

  config.vm.network "private_network", ip: "192.168.33.15"

  config.vm.provision "ansible" do |ansible|
    ansible.verbose = "v"
    ansible.playbook = "site.yml"
  end
end


Ph.D. / Golden Gate Ave, San Francisco / Seoul National Univ / Carnegie Mellon / UC Berkeley / DevOps / Deep Learning / Visualization

YouTubeMy YouTube channel

Sponsor Open Source development activities and free contents for everyone.

Thank you.

- K Hong


Vagrant


VirtualBox & Vagrant install on Ubuntu 14.04

Creating a VirtualBox using Vagrant

Provisioning

Networking - Port Forwarding

Vagrant Share

Vagrant Rebuild & Teardown

Vagrant & Ansible


Sponsor Open Source development activities and free contents for everyone.

Thank you.

- K Hong


DevOps


Phases of Continuous Integration

Software development methodology

Introduction to DevOps

Samples of Continuous Integration (CI) / Continuous Delivery (CD) - Use cases

Artifact repository and repository management

Linux - General, shell programming, processes & signals ...

RabbitMQ...

MariaDB

New Relic APM with NodeJS : simple agent setup on AWS instance

Nagios on CentOS 7 with Nagios Remote Plugin Executor (NRPE)

Nagios - The industry standard in IT infrastructure monitoring on Ubuntu

Zabbix 3 install on Ubuntu 14.04 & adding hosts / items / graphs

Datadog - Monitoring with PagerDuty/HipChat and APM

Install and Configure Mesos Cluster

Cassandra on a Single-Node Cluster

Container Orchestration : Docker Swarm vs Kubernetes vs Apache Mesos

OpenStack install on Ubuntu 16.04 server - DevStack

AWS EC2 Container Service (ECS) & EC2 Container Registry (ECR) | Docker Registry

CI/CD with CircleCI - Heroku deploy

Introduction to Terraform with AWS elb & nginx

Docker & Kubernetes

Kubernetes I - Running Kubernetes Locally via Minikube

Kubernetes II - kops on AWS

Kubernetes III - kubeadm on AWS

AWS : EKS (Elastic Container Service for Kubernetes)

CI/CD Github actions

CI/CD Gitlab


DevOps / Sys Admin Q & A


(1A) - Linux Commands

(1B) - Linux Commands

(2) - Networks

(2B) - Networks

(3) - Linux Systems

(4) - Scripting (Ruby/Shell)

(5) - Configuration Management

(6) - AWS VPC setup (public/private subnets with NAT)

(6B) - AWS VPC Peering

(7) - Web server

(8) - Database

(9) - Linux System / Application Monitoring, Performance Tuning, Profiling Methods & Tools

(10) - Trouble Shooting: Load, Throughput, Response time and Leaks

(11) - SSH key pairs, SSL Certificate, and SSL Handshake

(12) - Why is the database slow?

(13) - Is my web site down?

(14) - Is my server down?

(15) - Why is the server sluggish?

(16A) - Serving multiple domains using Virtual Hosts - Apache

(16B) - Serving multiple domains using server block - Nginx

(16C) - Reverse proxy servers and load balancers - Nginx

(17) - Linux startup process

(18) - phpMyAdmin with Nginx virtual host as a subdomain

(19) - How to SSH login without password?

(20) - Log Rotation

(21) - Monitoring Metrics

(22) - lsof

(23) - Wireshark introduction

(24) - User account management

(25) - Domain Name System (DNS)

(26) - NGINX SSL/TLS, Caching, and Session

(27) - Troubleshooting 5xx server errors

(28) - Linux Systemd: journalctl

(29) - Linux Systemd: FirewallD

(30) - Linux: SELinux

(31) - Linux: Samba

(0) - Linux Sys Admin's Day to Day tasks


Docker & K8s


Docker install on Amazon Linux AMI

Docker install on EC2 Ubuntu 14.04

Docker container vs Virtual Machine

Docker install on Ubuntu 14.04

Docker Hello World Application

Nginx image - share/copy files, Dockerfile

Working with Docker images : brief introduction

Docker image and container via docker commands (search, pull, run, ps, restart, attach, and rm)

More on docker run command (docker run -it, docker run --rm, etc.)

Docker Networks - Bridge Driver Network

Docker Persistent Storage

File sharing between host and container (docker run -d -p -v)

Linking containers and volume for datastore

Dockerfile - Build Docker images automatically I - FROM, MAINTAINER, and build context

Dockerfile - Build Docker images automatically II - revisiting FROM, MAINTAINER, build context, and caching

Dockerfile - Build Docker images automatically III - RUN

Dockerfile - Build Docker images automatically IV - CMD

Dockerfile - Build Docker images automatically V - WORKDIR, ENV, ADD, and ENTRYPOINT

Docker - Apache Tomcat

Docker - NodeJS

Docker - NodeJS with hostname

Docker Compose - NodeJS with MongoDB

Docker - Prometheus and Grafana with Docker-compose

Docker - StatsD/Graphite/Grafana

Docker - Deploying a Java EE JBoss/WildFly Application on AWS Elastic Beanstalk Using Docker Containers

Docker : NodeJS with GCP Kubernetes Engine

Docker : Jenkins Multibranch Pipeline with Jenkinsfile and Github

Docker : Jenkins Master and Slave

Docker - ELK : ElasticSearch, Logstash, and Kibana

Docker - ELK 7.6 : Elasticsearch on Centos 7 Docker - ELK 7.6 : Filebeat on Centos 7

Docker - ELK 7.6 : Logstash on Centos 7

Docker - ELK 7.6 : Kibana on Centos 7 Part 1

Docker - ELK 7.6 : Kibana on Centos 7 Part 2

Docker - ELK 7.6 : Elastic Stack with Docker Compose

Docker - Deploy Elastic Cloud on Kubernetes (ECK) via Elasticsearch operator on minikube

Docker - Deploy Elastic Stack via Helm on minikube

Docker Compose - A gentle introduction with WordPress

Docker Compose - MySQL

MEAN Stack app on Docker containers : micro services

Docker Compose - Hashicorp's Vault and Consul Part A (install vault, unsealing, static secrets, and policies)

Docker Compose - Hashicorp's Vault and Consul Part B (EaaS, dynamic secrets, leases, and revocation)

Docker Compose - Hashicorp's Vault and Consul Part C (Consul)

Docker Compose with two containers - Flask REST API service container and an Apache server container

Docker compose : Nginx reverse proxy with multiple containers

Docker compose : Nginx reverse proxy with multiple containers

Docker & Kubernetes : Envoy - Getting started

Docker & Kubernetes : Envoy - Front Proxy

Docker & Kubernetes : Ambassador - Envoy API Gateway on Kubernetes

Docker Packer

Docker Cheat Sheet

Docker Q & A

Kubernetes Q & A - Part I

Kubernetes Q & A - Part II

Docker - Run a React app in a docker

Docker - Run a React app in a docker II (snapshot app with nginx)

Docker - NodeJS and MySQL app with React in a docker

Docker - Step by Step NodeJS and MySQL app with React - I

Installing LAMP via puppet on Docker

Docker install via Puppet

Nginx Docker install via Ansible

Apache Hadoop CDH 5.8 Install with QuickStarts Docker

Docker - Deploying Flask app to ECS

Docker Compose - Deploying WordPress to AWS

Docker - WordPress Deploy to ECS with Docker-Compose (ECS-CLI EC2 type)

Docker - ECS Fargate

Docker - AWS ECS service discovery with Flask and Redis

Docker & Kubernetes: minikube version: v1.31.2, 2023

Docker & Kubernetes 1 : minikube

Docker & Kubernetes 2 : minikube Django with Postgres - persistent volume

Docker & Kubernetes 3 : minikube Django with Redis and Celery

Docker & Kubernetes 4 : Django with RDS via AWS Kops

Docker & Kubernetes : Kops on AWS

Docker & Kubernetes : Ingress controller on AWS with Kops

Docker & Kubernetes : HashiCorp's Vault and Consul on minikube

Docker & Kubernetes : HashiCorp's Vault and Consul - Auto-unseal using Transit Secrets Engine

Docker & Kubernetes : Persistent Volumes & Persistent Volumes Claims - hostPath and annotations

Docker & Kubernetes : Persistent Volumes - Dynamic volume provisioning

Docker & Kubernetes : DaemonSet

Docker & Kubernetes : Secrets

Docker & Kubernetes : kubectl command

Docker & Kubernetes : Assign a Kubernetes Pod to a particular node in a Kubernetes cluster

Docker & Kubernetes : Configure a Pod to Use a ConfigMap

AWS : EKS (Elastic Container Service for Kubernetes)

Docker & Kubernetes : Run a React app in a minikube

Docker & Kubernetes : Minikube install on AWS EC2

Docker & Kubernetes : Cassandra with a StatefulSet

Docker & Kubernetes : Terraform and AWS EKS

Docker & Kubernetes : Pods and Service definitions

Docker & Kubernetes : Headless service and discovering pods

Docker & Kubernetes : Service IP and the Service Type

Docker & Kubernetes : Kubernetes DNS with Pods and Services

Docker & Kubernetes - Scaling and Updating application

Docker & Kubernetes : Horizontal pod autoscaler on minikubes

Docker & Kubernetes : NodePort vs LoadBalancer vs Ingress

Docker & Kubernetes : Load Testing with Locust on GCP Kubernetes

Docker & Kubernetes : From a monolithic app to micro services on GCP Kubernetes

Docker & Kubernetes : Rolling updates

Docker & Kubernetes : Deployments to GKE (Rolling update, Canary and Blue-green deployments)

Docker & Kubernetes : Slack Chat Bot with NodeJS on GCP Kubernetes

Docker & Kubernetes : Continuous Delivery with Jenkins Multibranch Pipeline for Dev, Canary, and Production Environments on GCP Kubernetes

Docker & Kubernetes - MongoDB with StatefulSets on GCP Kubernetes Engine

Docker & Kubernetes : Nginx Ingress Controller on minikube

Docker & Kubernetes : Setting up Ingress with NGINX Controller on Minikube (Mac)

Docker & Kubernetes : Nginx Ingress Controller for Dashboard service on Minikube

Docker & Kubernetes : Nginx Ingress Controller on GCP Kubernetes

Docker & Kubernetes : Kubernetes Ingress with AWS ALB Ingress Controller in EKS

Docker & Kubernetes : MongoDB / MongoExpress on Minikube

Docker & Kubernetes : Setting up a private cluster on GCP Kubernetes

Docker & Kubernetes : Kubernetes Namespaces (default, kube-public, kube-system) and switching namespaces (kubens)

Docker & Kubernetes : StatefulSets on minikube

Docker & Kubernetes : StatefulSets on minikube

Docker & Kubernetes : RBAC

Docker & Kubernetes Service Account, RBAC, and IAM

Docker & Kubernetes - Kubernetes Service Account, RBAC, IAM with EKS ALB, Part 1

Docker & Kubernetes : Helm Chart

Docker & Kubernetes : My first Helm deploy

Docker & Kubernetes : Readiness and Liveness Probes

Docker & Kubernetes : Helm chart repository with Github pages

Docker & Kubernetes : Deploying WordPress and MariaDB with Ingress to Minikube using Helm Chart

Docker & Kubernetes : Deploying WordPress and MariaDB to AWS using Helm 2 Chart

Docker & Kubernetes : Deploying WordPress and MariaDB to AWS using Helm 3 Chart

Docker & Kubernetes : Helm Chart for Node/Express and MySQL with Ingress

Docker & Kubernetes : Docker_Helm_Chart_Node_Expess_MySQL_Ingress.php

Docker & Kubernetes: Deploy Prometheus and Grafana using Helm and Prometheus Operator - Monitoring Kubernetes node resources out of the box

Docker & Kubernetes : Deploy Prometheus and Grafana using kube-prometheus-stack Helm Chart

Docker & Kubernetes : Istio (service mesh) sidecar proxy on GCP Kubernetes

Docker & Kubernetes : Istio on EKS

Docker & Kubernetes : Istio on Minikube with AWS EC2 for Bookinfo Application

Docker & Kubernetes : Deploying .NET Core app to Kubernetes Engine and configuring its traffic managed by Istio (Part I)

Docker & Kubernetes : Deploying .NET Core app to Kubernetes Engine and configuring its traffic managed by Istio (Part II - Prometheus, Grafana, pin a service, split traffic, and inject faults)

Docker & Kubernetes : Helm Package Manager with MySQL on GCP Kubernetes Engine

Docker & Kubernetes : Deploying Memcached on Kubernetes Engine

Docker & Kubernetes : EKS Control Plane (API server) Metrics with Prometheus

Docker & Kubernetes : Spinnaker on EKS with Halyard

Docker & Kubernetes : Continuous Delivery Pipelines with Spinnaker and Kubernetes Engine

Docker & Kubernetes: Multi-node Local Kubernetes cluster - Kubeadm-dind(docker-in-docker)

Docker & Kubernetes: Multi-node Local Kubernetes cluster - Kubeadm-kind(k8s-in-docker)

Docker & Kubernetes : nodeSelector, nodeAffinity, taints/tolerations, pod affinity and anti-affinity - Assigning Pods to Nodes

Docker & Kubernetes : Jenkins-X on EKS

Docker & Kubernetes : ArgoCD App of Apps with Heml on Kubernetes

Docker & Kubernetes : ArgoCD on Kubernetes cluster

Docker & Kubernetes : GitOps with ArgoCD for Continuous Delivery to Kubernetes clusters (minikube) - guestbook


Terraform


Introduction to Terraform with AWS elb & nginx

Terraform Tutorial - terraform format(tf) and interpolation(variables)

Terraform Tutorial - user_data

Terraform Tutorial - variables

Terraform 12 Tutorial - Loops with count, for_each, and for

Terraform Tutorial - creating multiple instances (count, list type and element() function)

Terraform Tutorial - State (terraform.tfstate) & terraform import

Terraform Tutorial - Output variables

Terraform Tutorial - Destroy

Terraform Tutorial - Modules

Terraform Tutorial - Creating AWS S3 bucket / SQS queue resources and notifying bucket event to queue

Terraform Tutorial - AWS ASG and Modules

Terraform Tutorial - VPC, Subnets, RouteTable, ELB, Security Group, and Apache server I

Terraform Tutorial - VPC, Subnets, RouteTable, ELB, Security Group, and Apache server II

Terraform Tutorial - Docker nginx container with ALB and dynamic autoscaling

Terraform Tutorial - AWS ECS using Fargate : Part I

Hashicorp Vault

HashiCorp Vault Agent

HashiCorp Vault and Consul on AWS with Terraform

Ansible with Terraform

AWS IAM user, group, role, and policies - part 1

AWS IAM user, group, role, and policies - part 2

Delegate Access Across AWS Accounts Using IAM Roles

AWS KMS

terraform import & terraformer import

Terraform commands cheat sheet

Terraform Cloud

Terraform 14

Creating Private TLS Certs


Ansible 2.0


What is Ansible?

Quick Preview - Setting up web servers with Nginx, configure environments, and deploy an App

SSH connection & running commands

Ansible: Playbook for Tomcat 9 on Ubuntu 18.04 systemd with AWS

Modules

Playbooks

Handlers

Roles

Playbook for LAMP HAProxy

Installing Nginx on a Docker container

AWS : Creating an ec2 instance & adding keys to authorized_keys

AWS : Auto Scaling via AMI

AWS : creating an ELB & registers an EC2 instance from the ELB

Deploying Wordpress micro-services with Docker containers on Vagrant box via Ansible

Setting up Apache web server

Deploying a Go app to Minikube

Ansible with Terraform


Chef


What is Chef?

Chef install on Ubuntu 14.04 - Local Workstation via omnibus installer

Setting up Hosted Chef server

VirtualBox via Vagrant with Chef client provision

Creating and using cookbooks on a VirtualBox node

Chef server install on Ubuntu 14.04

Chef workstation setup on EC2 Ubuntu 14.04

Chef Client Node - Knife Bootstrapping a node on EC2 ubuntu 14.04


Elasticsearch search engine, Logstash, and Kibana


Elasticsearch, search engine

Logstash with Elasticsearch

Logstash, Elasticsearch, and Kibana 4

Elasticsearch with Redis broker and Logstash Shipper and Indexer

Samples of ELK architecture

Elasticsearch indexing performance


Redis In-Memory Database


Redis vs Memcached

Redis 3.0.1 Install

Setting up multiple server instances on a Linux host

Redis with Python

ELK : Elasticsearch with Redis broker and Logstash Shipper and Indexer


Big Data & Hadoop Tutorials


Hadoop 2.6 - Installing on Ubuntu 14.04 (Single-Node Cluster)

Hadoop 2.6.5 - Installing on Ubuntu 16.04 (Single-Node Cluster)

Hadoop - Running MapReduce Job

Hadoop - Ecosystem

CDH5.3 Install on four EC2 instances (1 Name node and 3 Datanodes) using Cloudera Manager 5

CDH5 APIs

QuickStart VMs for CDH 5.3

QuickStart VMs for CDH 5.3 II - Testing with wordcount

QuickStart VMs for CDH 5.3 II - Hive DB query

Scheduled start and stop CDH services

CDH 5.8 Install with QuickStarts Docker

Zookeeper & Kafka Install

Zookeeper & Kafka - single node single broker

Zookeeper & Kafka - Single node and multiple brokers

OLTP vs OLAP

Apache Hadoop Tutorial I with CDH - Overview

Apache Hadoop Tutorial II with CDH - MapReduce Word Count

Apache Hadoop Tutorial III with CDH - MapReduce Word Count 2

Apache Hadoop (CDH 5) Hive Introduction

CDH5 - Hive Upgrade to 1.3 to from 1.2

Apache Hive 2.1.0 install on Ubuntu 16.04

Apache HBase in Pseudo-Distributed mode

Creating HBase table with HBase shell and HUE

Apache Hadoop : Hue 3.11 install on Ubuntu 16.04

Creating HBase table with Java API

HBase - Map, Persistent, Sparse, Sorted, Distributed and Multidimensional

Flume with CDH5: a single-node Flume deployment (telnet example)

Apache Hadoop (CDH 5) Flume with VirtualBox : syslog example via NettyAvroRpcClient

List of Apache Hadoop hdfs commands

Apache Hadoop : Creating Wordcount Java Project with Eclipse Part 1

Apache Hadoop : Creating Wordcount Java Project with Eclipse Part 2

Apache Hadoop : Creating Card Java Project with Eclipse using Cloudera VM UnoExample for CDH5 - local run

Apache Hadoop : Creating Wordcount Maven Project with Eclipse

Wordcount MapReduce with Oozie workflow with Hue browser - CDH 5.3 Hadoop cluster using VirtualBox and QuickStart VM

Spark 1.2 using VirtualBox and QuickStart VM - wordcount

Spark Programming Model : Resilient Distributed Dataset (RDD) with CDH

Apache Spark 2.0.2 with PySpark (Spark Python API) Shell

Apache Spark 2.0.2 tutorial with PySpark : RDD

Apache Spark 2.0.0 tutorial with PySpark : Analyzing Neuroimaging Data with Thunder

Apache Spark Streaming with Kafka and Cassandra

Apache Spark 1.2 with PySpark (Spark Python API) Wordcount using CDH5

Apache Spark 1.2 Streaming

Apache Drill with ZooKeeper install on Ubuntu 16.04 - Embedded & Distributed

Apache Drill - Query File System, JSON, and Parquet

Apache Drill - HBase query

Apache Drill - Hive query

Apache Drill - MongoDB query


Puppet


Puppet with Amazon AWS I - Puppet accounts

Puppet with Amazon AWS II (ssh & puppetmaster/puppet install)

Puppet with Amazon AWS III - Puppet running Hello World

Puppet Code Basics - Terminology

Puppet with Amazon AWS on CentOS 7 (I) - Master setup on EC2

Puppet with Amazon AWS on CentOS 7 (II) - Configuring a Puppet Master Server with Passenger and Apache

Puppet master /agent ubuntu 14.04 install on EC2 nodes

Puppet master post install tasks - master's names and certificates setup,

Puppet agent post install tasks - configure agent, hostnames, and sign request

EC2 Puppet master/agent basic tasks - main manifest with a file resource/module and immediate execution on an agent node

Setting up puppet master and agent with simple scripts on EC2 / remote install from desktop

EC2 Puppet - Install lamp with a manifest ('puppet apply')

EC2 Puppet - Install lamp with a module

Puppet variable scope

Puppet packages, services, and files

Puppet packages, services, and files II with nginx Puppet templates

Puppet creating and managing user accounts with SSH access

Puppet Locking user accounts & deploying sudoers file

Puppet exec resource

Puppet classes and modules

Puppet Forge modules

Puppet Express

Puppet Express 2

Puppet 4 : Changes

Puppet --configprint

Puppet with Docker

Puppet 6.0.2 install on Ubuntu 18.04


GCP (Google Cloud Platform)


GCP: Creating an Instance

GCP: gcloud compute command-line tool

GCP: Deploying Containers

GCP: Kubernetes Quickstart

GCP: Deploying a containerized web application via Kubernetes

GCP: Django Deploy via Kubernetes I (local)

GCP: Django Deploy via Kubernetes II (GKE)


AWS (Amazon Web Services)


AWS : EKS (Elastic Container Service for Kubernetes)

AWS : Creating a snapshot (cloning an image)

AWS : Attaching Amazon EBS volume to an instance

AWS : Adding swap space to an attached volume via mkswap and swapon

AWS : Creating an EC2 instance and attaching Amazon EBS volume to the instance using Python boto module with User data

AWS : Creating an instance to a new region by copying an AMI

AWS : S3 (Simple Storage Service) 1

AWS : S3 (Simple Storage Service) 2 - Creating and Deleting a Bucket

AWS : S3 (Simple Storage Service) 3 - Bucket Versioning

AWS : S3 (Simple Storage Service) 4 - Uploading a large file

AWS : S3 (Simple Storage Service) 5 - Uploading folders/files recursively

AWS : S3 (Simple Storage Service) 6 - Bucket Policy for File/Folder View/Download

AWS : S3 (Simple Storage Service) 7 - How to Copy or Move Objects from one region to another

AWS : S3 (Simple Storage Service) 8 - Archiving S3 Data to Glacier

AWS : Creating a CloudFront distribution with an Amazon S3 origin

AWS : Creating VPC with CloudFormation

WAF (Web Application Firewall) with preconfigured CloudFormation template and Web ACL for CloudFront distribution

AWS : CloudWatch & Logs with Lambda Function / S3

AWS : Lambda Serverless Computing with EC2, CloudWatch Alarm, SNS

AWS : Lambda and SNS - cross account

AWS : CLI (Command Line Interface)

AWS : CLI (ECS with ALB & autoscaling)

AWS : ECS with cloudformation and json task definition

AWS : AWS Application Load Balancer (ALB) and ECS with Flask app

AWS : Load Balancing with HAProxy (High Availability Proxy)

AWS : VirtualBox on EC2

AWS : NTP setup on EC2

AWS: jq with AWS

AWS : AWS & OpenSSL : Creating / Installing a Server SSL Certificate

AWS : OpenVPN Access Server 2 Install

AWS : VPC (Virtual Private Cloud) 1 - netmask, subnets, default gateway, and CIDR

AWS : VPC (Virtual Private Cloud) 2 - VPC Wizard

AWS : VPC (Virtual Private Cloud) 3 - VPC Wizard with NAT

AWS : DevOps / Sys Admin Q & A (VI) - AWS VPC setup (public/private subnets with NAT)

AWS : OpenVPN Protocols : PPTP, L2TP/IPsec, and OpenVPN

AWS : Autoscaling group (ASG)

AWS : Setting up Autoscaling Alarms and Notifications via CLI and Cloudformation

AWS : Adding a SSH User Account on Linux Instance

AWS : Windows Servers - Remote Desktop Connections using RDP

AWS : Scheduled stopping and starting an instance - python & cron

AWS : Detecting stopped instance and sending an alert email using Mandrill smtp

AWS : Elastic Beanstalk with NodeJS

AWS : Elastic Beanstalk Inplace/Rolling Blue/Green Deploy

AWS : Identity and Access Management (IAM) Roles for Amazon EC2

AWS : Identity and Access Management (IAM) Policies, sts AssumeRole, and delegate access across AWS accounts

AWS : Identity and Access Management (IAM) sts assume role via aws cli2

AWS : Creating IAM Roles and associating them with EC2 Instances in CloudFormation

AWS Identity and Access Management (IAM) Roles, SSO(Single Sign On), SAML(Security Assertion Markup Language), IdP(identity provider), STS(Security Token Service), and ADFS(Active Directory Federation Services)

AWS : Amazon Route 53

AWS : Amazon Route 53 - DNS (Domain Name Server) setup

AWS : Amazon Route 53 - subdomain setup and virtual host on Nginx

AWS Amazon Route 53 : Private Hosted Zone

AWS : SNS (Simple Notification Service) example with ELB and CloudWatch

AWS : Lambda with AWS CloudTrail

AWS : SQS (Simple Queue Service) with NodeJS and AWS SDK

AWS : Redshift data warehouse

AWS : CloudFormation - templates, change sets, and CLI

AWS : CloudFormation Bootstrap UserData/Metadata

AWS : CloudFormation - Creating an ASG with rolling update

AWS : Cloudformation Cross-stack reference

AWS : OpsWorks

AWS : Network Load Balancer (NLB) with Autoscaling group (ASG)

AWS CodeDeploy : Deploy an Application from GitHub

AWS EC2 Container Service (ECS)

AWS EC2 Container Service (ECS) II

AWS Hello World Lambda Function

AWS Lambda Function Q & A

AWS Node.js Lambda Function & API Gateway

AWS API Gateway endpoint invoking Lambda function

AWS API Gateway invoking Lambda function with Terraform

AWS API Gateway invoking Lambda function with Terraform - Lambda Container

Amazon Kinesis Streams

Kinesis Data Firehose with Lambda and ElasticSearch

Amazon DynamoDB

Amazon DynamoDB with Lambda and CloudWatch

Loading DynamoDB stream to AWS Elasticsearch service with Lambda

Amazon ML (Machine Learning)

Simple Systems Manager (SSM)

AWS : RDS Connecting to a DB Instance Running the SQL Server Database Engine

AWS : RDS Importing and Exporting SQL Server Data

AWS : RDS PostgreSQL & pgAdmin III

AWS : RDS PostgreSQL 2 - Creating/Deleting a Table

AWS : MySQL Replication : Master-slave

AWS : MySQL backup & restore

AWS RDS : Cross-Region Read Replicas for MySQL and Snapshots for PostgreSQL

AWS : Restoring Postgres on EC2 instance from S3 backup

AWS : Q & A

AWS : Security

AWS : Security groups vs. network ACLs

AWS : Scaling-Up

AWS : Networking

AWS : Single Sign-on (SSO) with Okta

AWS : JIT (Just-in-Time) with Okta


Jenkins


Install

Configuration - Manage Jenkins - security setup

Adding job and build

Scheduling jobs

Managing_plugins

Git/GitHub plugins, SSH keys configuration, and Fork/Clone

JDK & Maven setup

Build configuration for GitHub Java application with Maven

Build Action for GitHub Java application with Maven - Console Output, Updating Maven

Commit to changes to GitHub & new test results - Build Failure

Commit to changes to GitHub & new test results - Successful Build

Adding code coverage and metrics

Jenkins on EC2 - creating an EC2 account, ssh to EC2, and install Apache server

Jenkins on EC2 - setting up Jenkins account, plugins, and Configure System (JAVA_HOME, MAVEN_HOME, notification email)

Jenkins on EC2 - Creating a Maven project

Jenkins on EC2 - Configuring GitHub Hook and Notification service to Jenkins server for any changes to the repository

Jenkins on EC2 - Line Coverage with JaCoCo plugin

Setting up Master and Slave nodes

Jenkins Build Pipeline & Dependency Graph Plugins

Jenkins Build Flow Plugin

Pipeline Jenkinsfile with Classic / Blue Ocean

Jenkins Setting up Slave nodes on AWS

Jenkins Q & A


Powershell 4 Tutorial


Powersehll : Introduction

Powersehll : Help System

Powersehll : Running commands

Powersehll : Providers

Powersehll : Pipeline

Powersehll : Objects

Powershell : Remote Control

Windows Management Instrumentation (WMI)

How to Enable Multiple RDP Sessions in Windows 2012 Server

How to install and configure FTP server on IIS 8 in Windows 2012 Server

How to Run Exe as a Service on Windows 2012 Server

SQL Inner, Left, Right, and Outer Joins


Git/GitHub Tutorial


One page express tutorial for GIT and GitHub

Installation

add/status/log

commit and diff

git commit --amend

Deleting and Renaming files

Undoing Things : File Checkout & Unstaging

Reverting commit

Soft Reset - (git reset --soft <SHA key>)

Mixed Reset - Default

Hard Reset - (git reset --hard <SHA key>)

Creating & switching Branches

Fast-forward merge

Rebase & Three-way merge

Merge conflicts with a simple example

GitHub Account and SSH

Uploading to GitHub

GUI

Branching & Merging

Merging conflicts

GIT on Ubuntu and OS X - Focused on Branching

Setting up a remote repository / pushing local project and cloning the remote repo

Fork vs Clone, Origin vs Upstream

Git/GitHub Terminologies

Git/GitHub via SourceTree II : Branching & Merging

Git/GitHub via SourceTree III : Git Work Flow

Git/GitHub via SourceTree IV : Git Reset

Git wiki - quick command reference


Subversion

Subversion Install On Ubuntu 14.04

Subversion creating and accessing I

Subversion creating and accessing II


Contact

BogoToBogo
contactus@bogotobogo.com

Follow Bogotobogo

About Us

contactus@bogotobogo.com

YouTubeMy YouTube channel
Pacific Ave, San Francisco, CA 94115

Pacific Ave, San Francisco, CA 94115

Copyright © 2024, bogotobogo
Design: Web Master